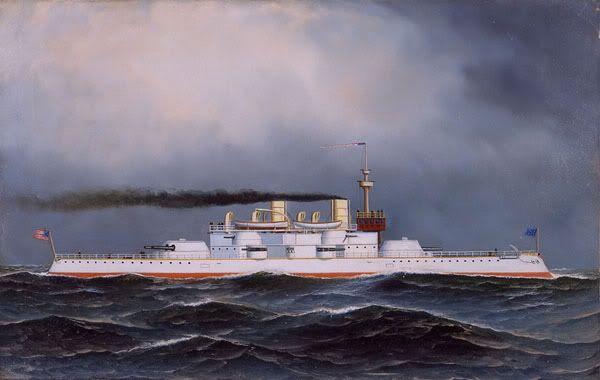
Sunday, January 8, 2012

Battle of Santigo De Cuba

In this post I chose to go back several months to early last year when I decided to model the fleets of the Spanish American War.  One of the Naval wargaming rule sets I really enjoy is Naval Thunder.  Naval Thnder and the supplements cover many time periods from Pre-dreadnoughts, WWI and WWII Naval Combat with a focus on surface actions.  After being introduced to these rules two years ago I have really come to enjoy the rules and especially the pre-Dreadnought time period.


This past year the second supplement for the Pre-dread period was releases "Rise of the Battleship II" which includes data for the Spansih American war ships as well as many other fleets from around the world.  As a result of these rules My interest has really peaked in this time period and I have done much reading on the subject.  It is a very interesting period in world history when batttleships were making their presence known on the world stage and battleship diplomancy was becoming the symbol of a nations military strenght.


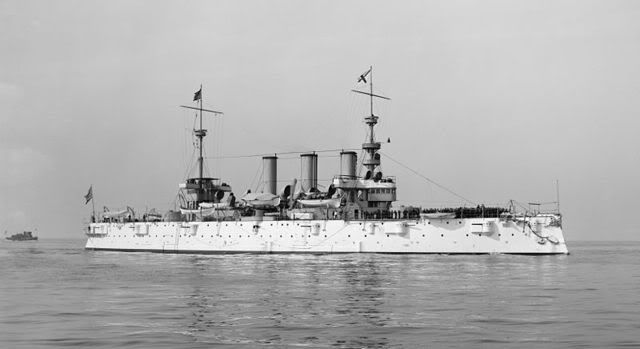
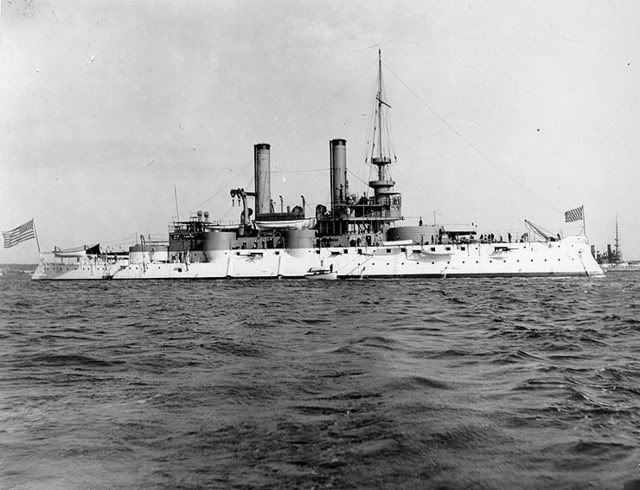
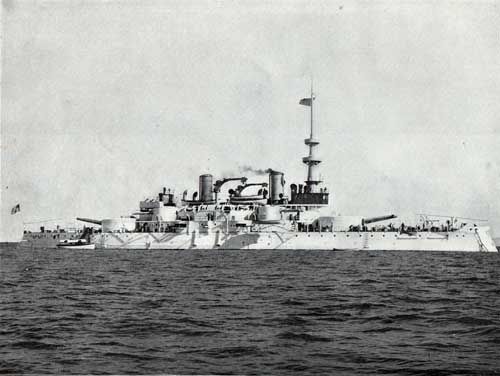
Below is a history of the Battle of Santiago De Cuba along with pictures of my 1/2400 scale fleets that I use to game this and other famous engagements along with many "what if" ahistorical battles.  In school I was taught that the Spanish American war was were America made a debut on the world stage defeating a world power.  Going back now and reading what what not in the text books it is clear that the United States was already a world power and that the outcome of that war was never in question from a military standpoint.


The historical text below comes from the wikepedia entry on the battle.
http://en.wikipedia.org/wiki/Battle_of_Santiago_de_Cuba


Battle of Santiago de Cuba

Spanish Fleet
The Spanish realized that the war would be decided by the campaign in Cuba. Even before the opening of hostilities, Admiral Pascual Cervera y Topete had been dispatched from Spain with the ultimate destination of Cuba. At best, the Spanish hoped to show the flag in their largest remaining New World colony; at worst, they hoped to have a force prepared to meet the powerful U.S. Navy.


Admiral Pascual Cervera
 There were striking contrasts between Cervera's squadron and the squadron lost by Admiral Patricio Montojo y Pasarón at the Battle of Manila Bay in the Philippine Islands on 1 May 1898. Montojo's squadron had been composed of obsolete ships primarily meant for revenue collection, while Cervera's squadron was composed of many modern warships, all of which were only a few years old at the time of this battle. Montojo's squadron had virtually no torpedo-launching capability, while Cervera brought with him the destroyers Pluton, Terror and Furor, three of the most advanced torpedo-armed warships in the world at the time. This destroyer flotilla was commanded by Captain Fernando Villaamil, well-known as the originator of the destroyer concept. Montojo's squadron was almost entirely unarmored, while nearly all of Cervera's warships were protected by armor of some kind.


However, it is evident from the records of the time and from Cervera's own writings that the Spanish admiral had the feeling that he was sailing to his doom. The breech mechanisms in many of the Spanish guns were dangerously faulty, causing jams and other mishaps. Many of the ships' boilers were in need of repair; several ships, including the armored cruiser Vizcaya, desperately needed bottom-cleaning as they were suffering from extra drag due to fouling. Worse yet, many of the gun crews were out of practice, having little experience with firing live rounds due to naval budget cuts since the Rif War in 1893-1894 and funding priority given to the Spanish Army. The most well-protected ship in Cervera's fleet, the second-generation armored cruiser Cristobal Colon, had not even had her main battery installed and carried wooden dummy guns instead.


Spanish Caribbean Squadron - Admiral Pascual Cervera

•Armored Cruiser Infanta Maria Teresa (flagship)


•Armored Cruiser Almirante Oquendo
        

•Armored Cruiser Vizcaya


Armored Cruiser Cristobal Colon


•Torpedo Boat Destroyer Pluton


•Torpedo Boat Destroyer Furor


Early in the year, Cervera had attempted to convince the Ministerio de Marina, a bureaucratic body responsible for governing Spain's admiralty, that the best strategy lay in resisting the Americans near the Canary Islands. Here, the fleet could be repainted, recoaled, and overhauled. It would then lie within range of the vast reserves of ammunition established in Spain and the firepower of the "Home Squadron". Cervera argued that he could then meet the U.S. fleet and destroy it. This strategy was endorsed by every officer under his command and many in the "Home Squadron", but was rejected by the Admiralty. Cervera's own misgivings reveal the seriousness of the situation faced:


It is impossible for me to give you an idea of the surprise and consternation experienced by all on the receipt of the order to sail. Indeed, that surprise is well justified, for nothing can be expected of this expedition except the total destruction of the fleet or its hasty and demoralized return.
On 30 April, Cervera set steam from Cape Verde, and panic gripped the U.S. populace, who did not know what his ships might do: attack the largely undefended East Coast while the fleet sailed about in an effort to engage him, prey upon American shipping, or perhaps sail up the Potomac and set fire to Washington, D.C. USN Order of Battle:
Cristobal Colon (left) and Vizcaya

Cervera managed to evade the U.S. fleet for several weeks, confounding his American counterparts and managing to re-coal in the process. Meanwhile Villaamil, who was in disagreement with both the Spanish Government's shaky war direction and Cervera's rather passive strategy, advocated trying to offset the superiority of the American forces by scattering the fleet and taking the initiative through quick and dispersed actions; he even volunteered to lead a diversionary attack to New York with his destroyers, but his proposals were not accepted.

Finally, on 29 May, after several misadventures, Cristóbal Colón was spotted in the harbor at
Santiago de Cuba by an American squadron.

American Fleet

Rear Admiral William T. Sampson

With the exception of Commodore George Dewey's squadron in the Pacific, nearly every warship in the United States Navy was near or on its way to Cuba. Only a handful of reactivated American Civil War era monitors and cutters of the United States Revenue Cutter Service remained to defend the U.S. coastline.
The primary elements of the U.S. force in Cuban waters were divided between two men:
Rear Admiral William T. Sampson of the North Atlantic Squadron and Commodore Winfield Scott Schley and the "Flying Squadron".

On the morning of 29 May, Cervera's squadron was sighted inside the safety of
Santiago Bay, Cuba, by elements of the "Flying Squadron". On 31 May, Schley was joined by Sampson, who took command of the situation and instructed a general blockade.


US North Atlantic Squadron - Rear Admiral William T. Sampson


•Armored Cruiser USS New York (flagship)
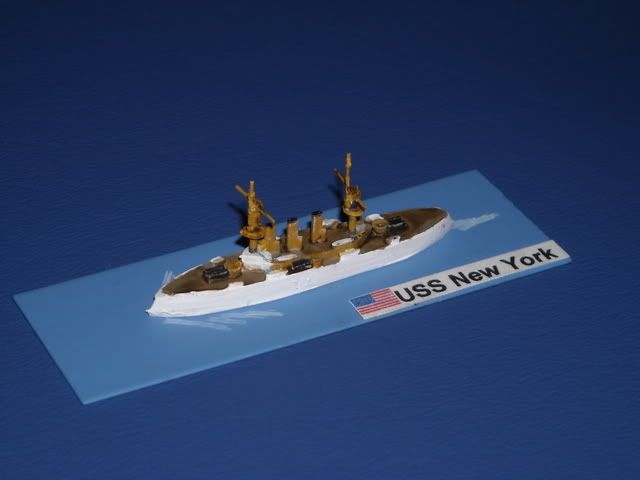


•Battleship USS Iowa
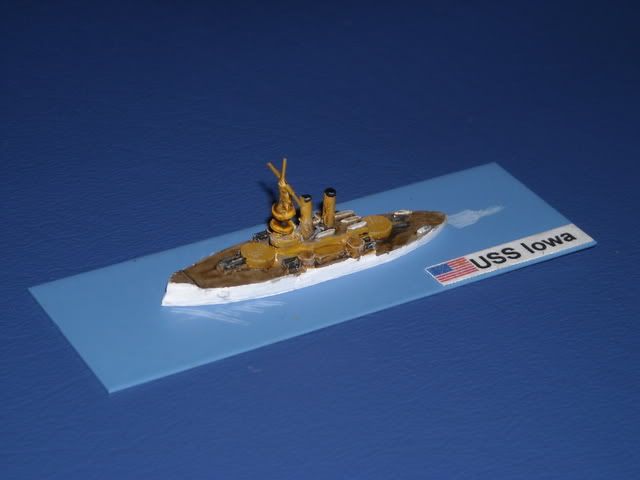

•Battleship USS Indiana
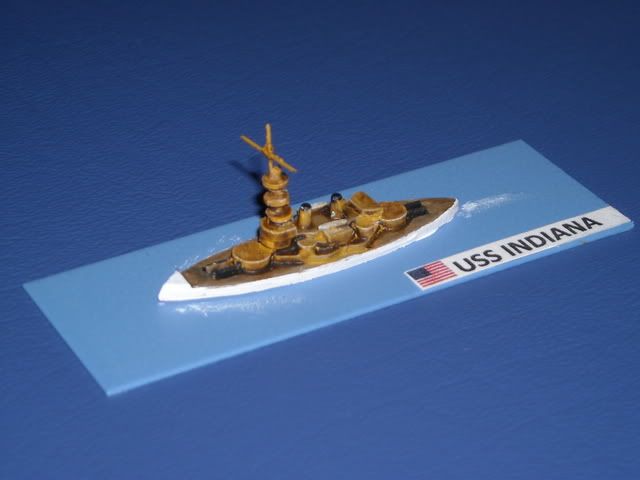

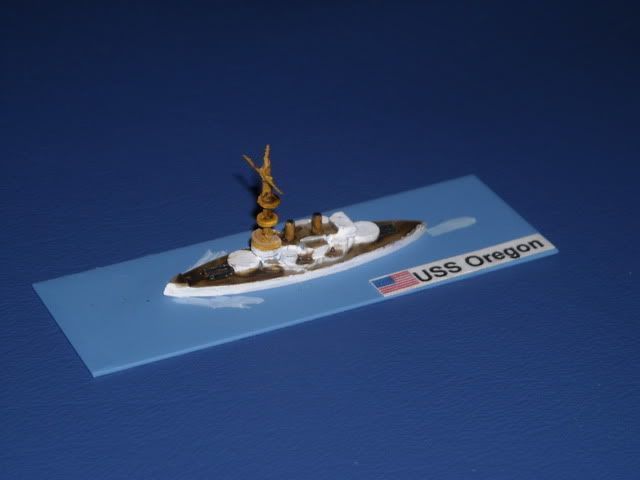
•Battleship USS Oregon


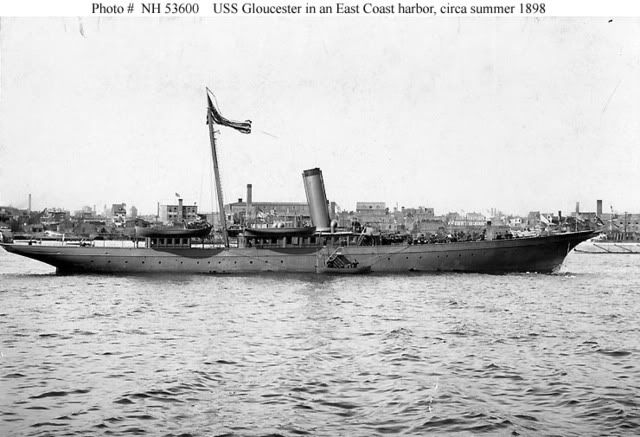
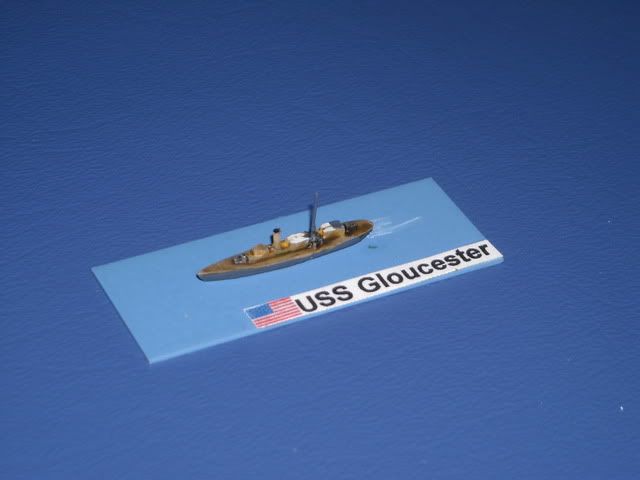
•Armed Yacht Gloucester


US "Flying Squadron" - Commodore Winfield Scott Schley

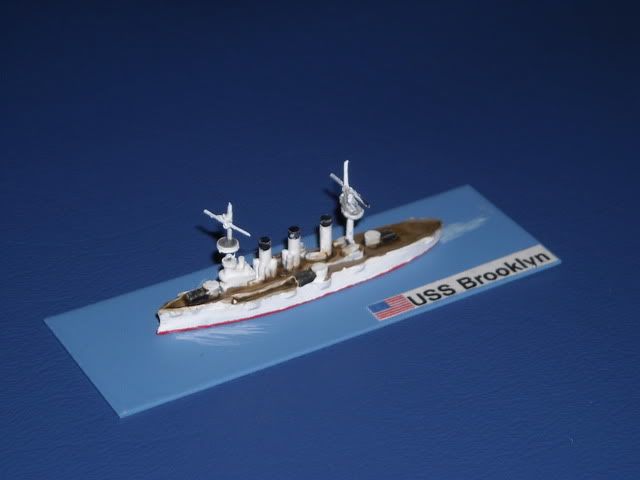
•Armored Cruiser USS Brooklyn (flagship)

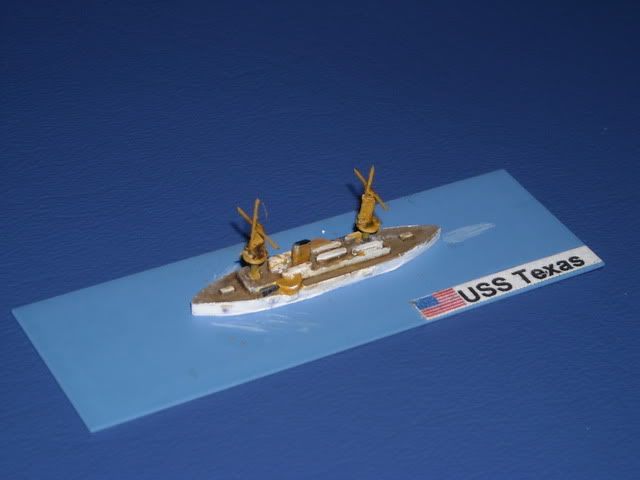
•Battleship USS Texas

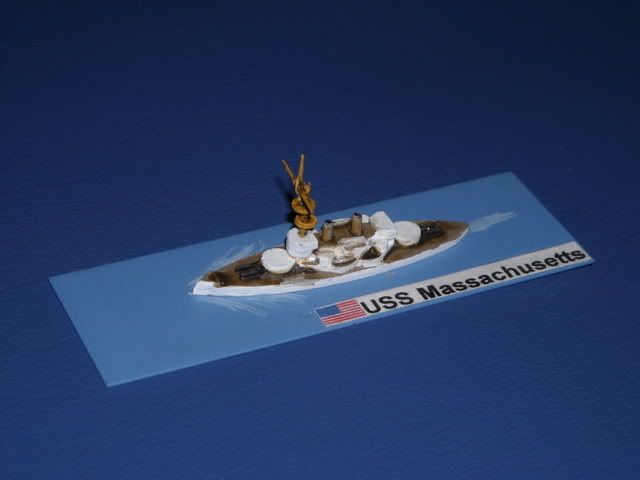
•Battleship USS Massachusetts


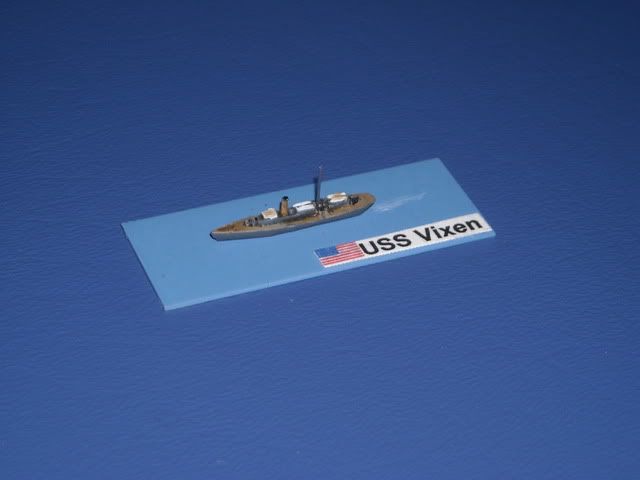
•Armed Yacht USS Vixen


Stand-off in Santiago Harbor
So long as Cervera remained within Santiago Harbor, his fleet was relatively safe. The guns of the city were quite sufficient to make up for deficiencies in his own, and the area was well defended with
sea mines, torpedoes and other obstructions. Nevertheless, Cervera was terribly outmatched. Though his ships were modern, they were too few, and their technical problems compounded his worries. The failure of Cuba's governor to assist with the repairs of the vessels in Cervera's squadron made the situation all the more desperate.


For more than a month, the two fleets faced off, with only a few inconclusive skirmishes resulting. For his part, Cervera was content to wait, hoping for bad weather to scatter the Americans so that he could make a run to a position more favorable for engaging the enemy. However, U.S. land forces began to drive on Santiago de Cuba, and by the end of June 1898, Cervera found himself unable to remain safely in the harbor. He would have to break out immediately if the fleet was to be saved.

The breakout was planned for 09:00 on Sunday, 3 July. This seemed the most logical time: the Americans would be at religious services, and waiting until night would only serve to make the escape that much more treacherous. By noon on Saturday, 2 July, the fleet had a full head of steam and had fallen into position for the breakout.


At about 08:45, just as his ships had slipped their moorings, Admiral Sampson and two ships of his command, his flagship, the armored cruiser USS New York, and the torpedo boat USS Ericsson had left their positions for a trip to Siboney and a meeting with Major General William Shafter of the U.S. Army. This opened a gap in the western portion of the American blockade line, leaving a window for Cervera.

Sampson's New York was one of only two ships in the squadron fast enough to catch Cervera if he managed to break through the blockade. Further, the battleship
USS Massachusetts had left that morning to coal. With the departure of Admiral Sampson, who had signaled "Disregard movements of flagship," immediate command devolved to Commodore Schley in armored cruiser USS Brooklyn, which now became the de facto flagship of the U.S. blockade.

Thus, the American blockade formation that morning consisted of Schley's Brooklyn, followed by the battleships
USS Texas, Oregon, Iowa and Indiana and auxiliary cruisers USS Vixen and Gloucester.
At 09:35, the navigator of Brooklyn sighted a plume of smoke coming from the mouth of the port. He anxiously signaled the rest of the fleet:


The Enemy is coming out!

The Spanish ships began their race from the mouth of Santiago Bay at about 09:45, traveling in a rough line ahead formation. In the lead was Cervera's flagship, the armored cruiser Infanta Maria Teresa, followed by the armored cruisers Vizcaya, Cristóbal Colón, and Almirante Oquendo, and finally the torpedo-boat destroyers Furor and Pluton. The four cruisers immediately cut in a southwest direction, attempting to break into the open sea before the U.S. blockading force could respond.

The battle commenced almost immediately, the first shots being fired by Cervera's Infanta Maria Teresa as she strove to gain the western gap in the blockade line before Brooklyn could close it. While the Spanish had taken the initiative by beginning the engagement, two factors slowed their escape. The first was the continuing problem experienced in maintaining proper speed by Vizcaya; the second was the poor quality of most of the coal in the Spanish holds. An expected re-supply of high-quality Cardiff coal from Britain had been captured, along with its transport, by the American auxiliary cruiser USS Saint Paul on 25 May.

Upon sighting the emerging Spanish ships, the American blockaders had to turn to the south since they had all been facing towards the harbor entrance. Brooklyn headed nearly straight for Infanta Maria Teresa at first, but when it appeared that she would be surrounded by all four of the Spanish cruisers, Commodore Schley ordered a "retrograde loop" that pulled her away, and then alongside, the line of Spanish ships fleeing southwest. This maneuver has been controversial ever since, because it seemed to threaten Texas with collision and forced her to stop engines for some moments. Texas then swung behind Brooklyn. Oregon, initially to the rear of the action but the fastest ship in the U.S. fleet, soon raced past Indiana, which had an engine problem and could make only 9 
kn (10 mph; 17 km/h) at the time of the battle. Iowa had started from a disadvantaged position and was passed by Infanta Maria Teresa but hit her with two 12 in (300 mm) rounds from 2,600 yd (2,400 m) and swung into the chase. As Iowa was passed in turn by Cristóbal Colón, the Spanish ship hit her with two shots from her secondary battery. One of these, struck near the waterline and caused Iowa to slow and she therefore engaged Almirante Oquendo, bringing up the rear of Cervera's four cruisers.

Rather than expose the entirety of his fleet to the American battle line, Cervera had signaled his other ships to continue to the southwest while he attempted to cover their escape, directly engaging Brooklyn, his nearest enemy. Though Brooklyn was hit more than 20 times during the battle, she suffered only two casualties, while her return fire resulted in the deaths of most of Cervera's bridge crew and grave damage to the ship generally. Under this brutal punishment, Infanta Maria Teresa began to burn furiously. Cervera ordered her aground in shallows along the Cuban coast, by which time she was completely wrecked and aflame. Admiral Cervera survived and was rescued, picked up near
Punta Cabrera by the crew of Gloucester.

The rest of the Spanish fleet continued its race for the open sea. Almirante Oquendo was hit repeatedly by Iowa and driven out of the battle by the premature detonation of a shell stuck in a defective breech-block mechanism of an 11 in (280 mm)
turret. A boiler explosion finished her, and she was ordered scuttled by her mortally wounded Captain Lazaga. Pluton and Furor made a dash in a direction opposite the rest of the Spanish squadron. At first taken under light fire by Gloucester and then, fatally, by shelling from the battleships Iowa, Indiana, and eventually New York, commanded by Rear Admiral Sampson who had turned his flagship around and was racing to join the fight. Furor was sunk before making the beach, with the lifeless body of her commander Villaamil and several of his sea-fellows; Pluton succeeded in grounding herself but blew up.


Vizcaya Blows Up
Vizcaya, was locked in a running gun duel for nearly an hour with Brooklyn. Despite steaming side-by-side with Schley's flagship at about 1,200 yd (1,100 m) and even with some good shooting which knocked out a secondary gun aboard Brooklyn, almost none of the Spaniards' nearly 300 shots caused significant damage, while Brooklyn pounded Vizcaya with effectiveness. Subsequent claims by Admiral Cervera, and later research by historians, have suggested that nearly 85% of the Spanish ammunition at Santiago was utterly useless, either defective or simply filled with sawdust as a cost-saving measure for practice firing. The American ammunition had no such issues of lethality. Vizcaya continued the fight until overwhelmed, and by the end of the engagement she had been struck as many as 200 times by the fire from Brooklyn and Texas. Brooklyn had closed to within 950 yd (870 m) when she finally delivered a 8 in (200 mm) round which, according to witnesses, may have detonated a torpedo being prepared for launch. A huge explosion ensued, Vizcaya ceased to be militarily effective, and fires raged out of control. She hauled down her flag and turned toward the beach to ground herself.

Within a little more than an hour, five of the six ships of the Spanish Caribbean Squadron had been destroyed or forced aground. Only one vessel, the speedy new armored cruiser Cristóbal Colón, still survived, steaming as fast as she could for the west and freedom. Though modern in every respect and possibly the fastest ship in either fleet, Cristóbal Colón had one serious problem: She had been only recently purchased from Italy, and her main 10 in (250 mm) armament was not yet installed because of a contractural issue with the British firm of
Armstrong[disambiguation needed ]. She therefore sailed with empty main turrets, albeit retaining her ten 6 in (150 mm) secondary battery. This day, speed was her primary defense.

At her best rate of nearly 20 kn (23 mph; 37 km/h), Cristóbal Colón slowly distanced herself from the pursuing U.S. fleet. Her closest antagonist, USS Brooklyn, had begun the battle with just two of her four engines coupled, because of her long stay on the blockade line and could manage barely 16 kn (18 mph; 30 km/h) while building steam. As Brooklyn helplessly tossed 8 in (200 mm) rounds at the rapidly disappearing Cristóbal Colón, there was only one ship in the U.S. fleet with a chance of maintaining the pursuit. Only the Oregon, now inexorably moving up through the pack, had the speed to overhaul Cristóbal Colón.

At the start of the war, Oregon was anchored in
San Francisco Bay. In this age before the Panama Canal, she had taken 67 days to come 15,000 mi (13,000 nmi; 24,000 km) at maximum speed, all the way around South America and through the violent Strait of Magellan, to join the U.S. fleet off Santiago de Cuba. An epic journey in itself, this voyage was now to be capped by a deadly race which no other American warship in the fight could have won.

For 65 minutes, Oregon pursued Cristóbal Colón. Cristóbal Colón had to hug the coast and was unable to turn toward the open sea because Oregon was standing out about 1.5 mi (1.3 nmi; 2.4 km) from Cristóbal Colón's course and would have been able to fatally close the gap had Cristóbal Colón turned to a more southerly course.

Finally, three factors converged to end the chase: First, Cristóbal Colón had run through her supply of high-quality
Cardiff coal and was forced to begin using an inferior grade obtained from Spanish reserves in Cuba. Second, a peninsula jutting out from the coastline would soon force her to turn south, across Oregon's path. And third, on the flagship Brooklyn, Commodore Schley signaled Oregon's Captain Charles Clark to open fire. Despite the immense range still separating Oregon and Cristóbal Colón, Oregon's forward turret launched a pair of 13 in (330 mm) shells which bracketed Cristóbal Colón's wake just astern of the ship.

Captain
Emilio Diaz Moreu, humanely declining to see his crew killed to no purpose, abruptly turned the undamaged Cristóbal Colón toward the mouth of the Tarquino River and ordered the scuttle valves opened and the colors struck as she grounded. His descending flag marked the end of Spain's naval power in the New World.

As the ships of the U.S. fleet pushed through the carnage, rescuing as many Spanish survivors as possible, an
officer was fished out by sailors of Iowa. At first unrecognizable under a bloody bandage and covered in oil and soot, this man proved to be Captain Don Antonio Eulate of Vizcaya. Standing shakily on the deck of Iowa, he thanked his rescuers and gravely presented his sword to Captain Robley Evans, who handed it back as an act of chivalry. Eulate then turned to look out at the burning wreck of his ship and saluted her.
Adios, Vizcaya!
At his words, the fires raging onboard Vizcaya reached her magazines, and she exploded.

Aftermath

The battle was the end of any noteworthy Spanish naval presence in the New World.[citation needed] It forced Spain to re-assess its strategy in Cuba and resulted in an ever-tightening blockade of the island. While fighting continued until August, when the Treaty of Paris was signed, all surviving Spanish capital ships were now husbanded to defend their homeland leaving only isolated units of auxiliary vessels to defend the coast. Uncontested U.S. control of the seas around Cuba made resupply of the Spanish garrison impossible and its surrender inevitable.

The U.S. ships at Santiago, for their part, suffered many hits in the battle but very little serious damage. The small armed yacht Vixen was nearly sunk, but casualties on the American side of the affair were remarkably light; only one man was killed,
Yeoman George Henry Ellis of Brooklyn. Spanish casualties numbered nearly 500, including Captain Villaamil of Furor, the highest-ranking Spanish officer to lose his life in the battle. All six vessels of the Spanish squadron were lost. The 1,612 Spanish sailors rescued, including Admiral Cervera, were sent to Seavey's Island at the Portsmouth Naval Shipyard in Kittery, Maine, where they were confined at Camp Long from July 11, 1898 until mid-September 1898.

In the aftermath of the battle, General Chambers McKibbin, originally of
Chambersburg, Pennsylvania, was selected as Military Governor of the City of Santiago de Cuba.[1]
Two of the Spanish ships, Infanta Maria Teresa and Cristóbal Colón, were later re-floated and taken over by the U.S. Both eventually foundered and were lost. The
Reina Mercedes, abandoned in Santiago Bay because of engine troubles, was an unprotected cruiser captured by the U.S. Navy and used as a receiving ship until 1957 as the USS Reina Mercedes
The Models:
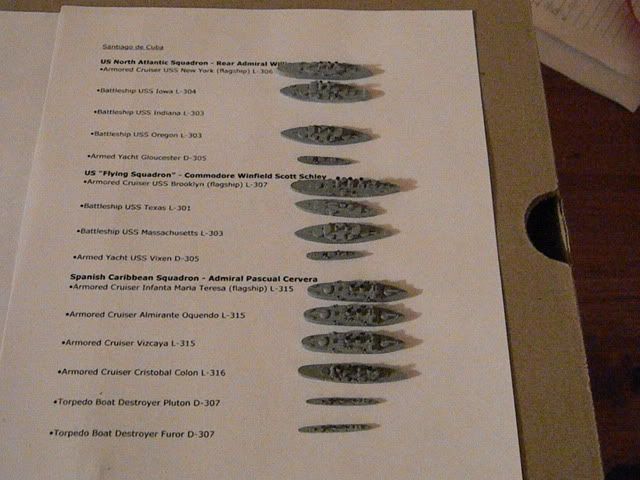

The models pictured above are 1/2400 scale resin models produced by Panzerschiffe. 
http://www.panzerschiffe.com/Catalog.html


The picture at the right shows the models before they were painted.  I have used Panzerschiffe for just about all my Pre-dread fleets because they are very affordable and have a decent amount of detail.


In my opinion the only thing lacking for detail in these models is the lack of masts.  As a result through researching the web, time and patience I have added the masts you see in the pcitures.  The process I use is fairly simple. I use various thickness of piano wire whichI purchase from the hobby store.  I then drill small holes in the model at the appropriate locations and insert the guage wire I want to use making sure it is a tight fit.  If it is a two part mast I then glue and upper section to the lower thicher wire.  I usually paint the wire first as the glue seems to bond better for a quick hold.  In order to model the crows nest I use a thin sheet of styrene.  I drill an approprite size hole in the styrene and then use a standard paper hole puch center it over the drilled hole and punch it out.  This is then slid over the mast an glued in place.  Overall I think the masts really add alot to the collection and bring out some eye popping detail on the gaming table especially at the 1/2400 scale.
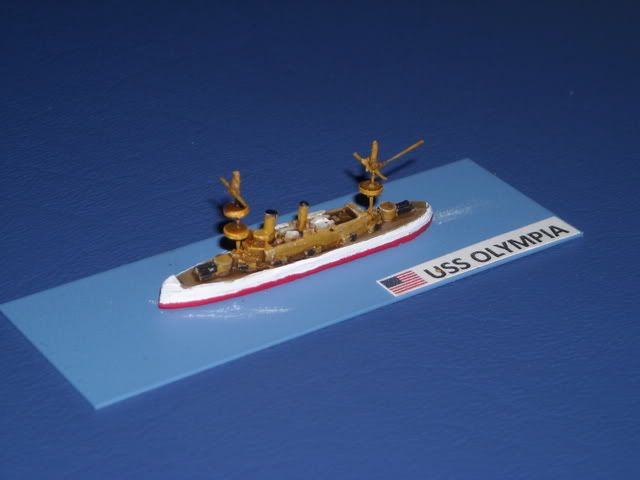

Once the models are completely painted to my satifaction I mount them on 1"x 3" metal bases that have been pre-pianted.  I use metal bases as my storage trays are lines with magnetic sheets to hold them in place for safe transport.  Once mounted I add the labels and some wakes for visual effect.  Once complete and dry I spray all my military models with two light coats of testors dull coat to seal them and provide a protective coating.


At this time I have the complete order of battle for the above battle as well as the Battle of Manilla bay.  The rules I use are Naval Thunder Rise of the Battle ship.  I only had the opportunity to sail these ships once since I completed them (See "Remeber the Maine" post).  What I learned when comparing the stats is that gaming the Spanish American war is a severly lopsided affair when using historical OoB.  As a result when I return home I plan to add several more spanish units for more "What if" gaming action like I did in 'Remeber the Maine" on a larger scale.


Until next time.........


Thursday, January 5, 2012

Planes, Planes and More Planes

Despite currently being half a world away from home and my gaming hobbies I am eagerly awaiting the release of two air combat games that are both due to release in January and February.

The first is an old favorite, Wings of War, being released by a new manufacturer, Ares games, with a slight name change, Wings of Glory.  Those that know me or have read some of my other articles already know that I am a huge fan and supporter of Wings of War. 
I currently own the complete collection of both WWI and WWII products that were previously manufactured by Nexus games.  I was disapointed to learn this past summer that Nexus was suddenly folding due to poor fiscal mismanagement.  As a result I evaluated my collection and decided to procure the few missing items I did not yet own and complete my collection of what Nexus currently offered for fear it would ot be available later.  Before I deployed the news broke that the game designer had retained the rights to Wings of War and was looking for a new game company to manufature it.  At the time I figures it would be at least a year before any new releases came out.  I am happy to report that I was wrong. 

Wings of Glory is now scheduled to release this month, January 2012, and pick up right where Wings of War left off with a WWII Set 3 (8 new models)  and new WWI bombers set (4 new models). 

In addition, they are releasing a new deluxe starter WWII starter set.


As I understand it Wings of Glory will be completely compatible with all the earlier released Wings of War products.  The designer has taken this opportunity to slightly revise the cards (mostly art work) as well as modify a few of the advanced optional rules such as altitude.  I know the above deluxe starter as well as a complete set of the planes will be on my wish list.  I am eager to see what all the changes are and how they will affect game play. 


On the WWI front the new bombers have long been awaited (Gotha G.V. and Caproni CA3) by the die hard WWI Wings of War fans. There are only four new models being release (2 models with 2 paint schemes) with this first release and they will compliment the previous flight of the giants boxed set that was the last WWI release from Nexus.  I know they will be a welcome addition to my WWI squadrons.


The second game I am looking forward to is Axis and Allies Angels 20 (AA20).  This will be the third WWII miniature related game produced by Wizards of the Coast (WotC).  The previous two games Axis and Allies Miniatures (WWII Land Combat) and Axis and Allies War at Sea (WWII Naval Combat) both enjoyed immense success in their own right.  They both are centered around the concept of providing players pre-painted miniatures and a simple gaming format.  The other unique aspect to both these games unlike any other WWII miniatures game is that they are a Collectible Miniature Games (CMG) where players buy boosters and receive random units.  Of course if you are a die hard like me you purchase the boosters by the case so you ar sure to get them all and in multiples.  Needless to say I am a huge fan of both games and own complete collections.

Although I have completely bought into both of the other WotC product lines I am approaching AA20 a bit more cautiously.  This game will again be a CMG, but I am not convinced that is a wise move for a WWII air combat game.  Like the other two games AA20 will have a starter set (includes six non-random planes) with a complete set of rules, a paper map for the planes to manuever around, and a complete set of statistic cards for each plane they produce in the first set (30 models). 
  

Like AAM and WaS, AA20  will also  have random boosters each conatining three random planes.  The Starter MSRP is $39.99 and each booster MSRP is $24.95.  This is the first mistake I think WotC is making with this new game.  They are entering a market that already has well established pre-painted aircraft models.  By charging $24.95 for a chance to buy the plane a gamer wants I fear they will not achieve the sales they desire especially when there are other games (see above) that offer similar or better quality models at the same or lower price and the gamer can choose which models they want to purchase.  Due to the fact that there is already a well established market I do not think making this game a CMG is a smart move.


The other thing that concerns me about AA20 is the scale of the models.  The planes will be 1/100 or 15mm plastic models.  Based on the pictures I have seen it appears the quality will be about the same or slighlty better than the aircraft models they provided for AAM only bigger.  In my opinion 1/100 scale is just to big for a table top WWII aerial combat game.  Then I have read that some play Wings of War with 1/72 scale models, so I guess anything is possible.


As you can see from the above picture the quality seems OK, but the lack of a clear canopy and prop tell me that WotC is cutting corners when the established competition already does not.

The other issue that concerns me about AA20 is the fact that it was recently announced that key members of the design time were laid off right before the holidays.  In my mind this creates doubt for the possibility of future expansions for AA20.  Sure there is the possibility that the game designers can be hired back as free-lance contractors, but announcing they were let go 60 days prior to the release of a new line does not give most alot of confidence.

My hope is that the saving grace for AA20 will be the rule system.  Not having played the game yet I really cannot speak to it.  I have read a handful of posts from people that have play tested AA20 and they really liked the dice based system using stat cards similar to the systems used in both AAM and WaS.

The other possible saving grace for AA20 may be the many devoted Axis and Allies fans who seem like they will buy anything made by WotC and get into the collectible aspect of these games.  This has definately been the case with War at Sea and for a while AAM.  I have been one of these players in the past.  I hope WotC is not counting on this factor too much as I fear price and competition as well as being late the to the scene (others like me already play other air combat games) may keep some away especially in a poor economy.

As for me I will definately be giving AA20 a try and buying at least a starter and if available a few select planes as singles on the secondary market.  Unlike previous WotC prodcuts I have no plans to buy these by the case.  This is 100% due to the competition factor as I already own a product with which I a very happy.  I have no plans to sell off my Wings of War/Wings of Glory collection at this time or any point in the future. In fact I plan to expand with the new releases coming out.  If I really like the AA20 rules when I get home I will find compatible stands (Most likely litko) and use my Wings of War Air armada with these new rules on occasion.

Either way I am hoping AA20 will be a success for WotC because I fear that if it fails WotC may fold on all the their hsitorical games.  The Avalon Hill line of games has always been a secondary effort for WoTC which is a shame as I and many others really enjoy them and will continue to support them if they continue to make them.  Mostly I hope AA20 will relase on time so I can get a copy and enjoy some relaxing game time while I am deployed.  It will also give me the opportunity to write a detailed review of the game for a future blog post.

More to come......


Tuesday, January 3, 2012

War At Sea Large Map House Rules

This is my first post of the New year.  I decided to start out the new year by finishing some old business I wanted to get done last year.  One of my favorite Beer and Pretzels games is  Axis and Allies War at Sea which first came out in March 2007.  It is a collectible miuatures game based on WWII naval warfare.  Very simple table top game with nice plastic 1/1800 scale pre-painted minis that are sold as a starter set and in random boosters. 

2010 Starter pack


Currently there have been a total of six sets produced and I currently own every unit made and most in multiples.  In addition to using the ships for War at Sea I use them for my other more serious WWII Naval gaming.

Before being intorduced to several other Naval rule sets I knew I wanted to do more with my War at Sea collection than the basic rules allowed.  I quickly realized that a larger gaming surface would more accurately represent the large scale carrier battles of WWII.  About a month after the game was released in 2007 I went to work on making a large scale map a reality.  Instead of using the small paper map that comes wit the basic game I built a 4'x8' gaming table complete with the WaS grid system and some 3D islands instead of the card stock ones provided.  With the help of my two sons who were 11 and 10 at the time we created the base for what has become my Large Map house rules.  These have been posted on the "foruMINI" since June of 2009 and updated sevral times since first created.  With the introdcution of every new set certain modifications needed to be made to accout for new aircraft and some special abilities, but the basic premise never changed. 

HMS Eagle


Since posting these online  I have received numerous request for the word document version of my rules and they have been very popular with the War at Sea fan base who like me wanted a bit more form their gaming experience without delving into other more comples rules.  I have honore those requests, but for the last year I had not updated the rules due to time and other commitements.  I have now taken the time to do just that.  In addition, I have now posted the word version of the rules on a file share site so anyone can download the most current version without e-mailing me.

 "afilter's War at Sea Large Map House rules"


Introduction:

These rules are designed to augment the WAS game system.  They were created with the idea of playing WAS on a larger map and to simulate more realistic carrier and air operations within the current game system.  These rules incorporate continuous flight for planes with a limited range each plane can move per air phase.  Unless otherwise noted the basic WAS advance rules apply.
These rules are not designed to turn WAS into a simulation.  Instead they are intended to give WAS more of a flavor of WWII naval aviation combat where the fleets are spread farther apart and admirals must manage their air arm as well as the surface fleet.  They are also intended to keep carriers at a longer range from other carriers and surface ships as historically occurred in the war.

Even with these house rules I realize there are many areas that could still be improved to add more realism especially in the area of recovery and re-arming times for aircraft.  The intent is to keep the game fairly simple within the basic WAS structure and avoid a lot of record keeping as occurs in other naval war gaming rule sets.  Of course more cards and units can be created to further add realism, but that was not my intent.  Any player possessing the basic units and ability to obtain a larger map can use these rules.

THE MAP:


As mentioned above these rules are designed to be played on a larger map in order to stretch the battle area out.  We chose to build a larger map using a 4’x8’ board with a 4” WAS style grid system to create a battle space 24x12 sectors instead of the 11x7 sectors on the basic paper map. 

We realize not everyone has the means to do this.  Another easier option is to use multiple WAS maps and just trim or fold back the edges to line them up and create a larger battle area.  Whatever you decide I think you will enjoy the ability to deploy larger fleets in a bigger area with more maneuver room.

Sequence of Play

A. Initiative phase
B. Sea Movement phase
• First Player’s Sea Movement step
• Second Player’s Sea Movement step
C. Air Mission phase (players alternate moving Aircraft)
 -Aircraft move along the map up to the maximum number of sectors per phase (see air range chart)
 -Check for Air Defense if an Air group passes through a sector containing an enemy unit
D. Air Defense phase
• First Player’s Air Defense step
• Second Player’s Air Defense step
(Units that participated in Air Defense during Air Mission phase are not included in this Phase)
E. Air Attack phase
• First Player’s Air Attack step
• Second Player’s Air Attack step
F. Surface Attack phase/Surface unit torpedo attacks
• First Player’s Surface Attack step
• Second Player’s Surface Attack step
G. Submarine Attack phase
• First Player’s Submarine Torpedo Attack step
• Second Player’s Submarine Torpedo Attack step
H. Air Return phase (players alternate moving Aircraft)
-Aircraft move along the map up to the maximum number of sectors per phase (see air range chart)
 -Check for Air Defense if an Air Group passes through a sector containing an enemy unit, ships that used air defense during Air placement phase or air defense phase cannot fire during this phase.
I. End of Turn

Air Movement:


Instead of just placing air units they now have a movement range and fly across the map in continuous flight from the start point to the target and back.

Air units do not have to land each turn, but can remain in flight from one turn to the next.
Air units move a number of sectors equal or less than their max movement range.
 Air Range Chart

Air UnitALLIES:              Max Sectors/phase     AXIS:       Max Sectors/phase
Sea Hurricane Mk 1B        9                       FW 200 Kondor           6
Swordfish Mk. II               4                        Ju 87B Stuka                6
Barracuda Mk II                6                        BF 109                         9
Halifax GR Mk V              8                         C 202 Foglore            10
Beaufighter                        9                         JU-87 R2 Ricchiateli     7
F4F Wildcat                     9                          SM 79 Sparviero         8
PBY Catalina                    5                         A6M2 "Zeke"               9
SBD Dauntless                  7                         B5N2 "Kate"                6
TBD Devastator               5                          D3A "Val"                     6
B-25H Mitchell                 8                         G4M "Betty"                  7
F6F-3 Hellcat                   10                       A6M2 Zero Kamikaze    8
TBF Avenger                    7                         D4Y1 "Judy"                   9
Martlet Mk. I                    9                         H8K1 Type 2 "Emily"      8
SB2C Helldiver                 8                         JU88A-4                        9
D520                               10                         Re 2001 CB                  10
V-156F Vindicator            7                        A6M5 “Zeke”                  9
Sunderland Mk. 1             6                          B6N2 “Jill”                      8
B-24D Liberator               8                          Fi 167                            6
F4U-1A Corsair               12                        Z.506B Airone                6
P-40E Warhawk              10                        N1K1-J George              11
PBY Black Cat                  5                        B-239 Buffalo                  9   
IL-2M Sturmovik               7                       A6MN "Rufe"                  8
           
*Formula used to determine number of sectors an air unit can move per phase:
(Planes max MPH/12) x (1760) = (yds/air movement phase) / 5000yds = sectors per phase

** Always round down

A6M2 Zero


Air Defense:

If an air unit passes through a sector containing and enemy ship/plane or shore battery with an AA rating the opponent has the opportunity to make an immediate air defense roll using the AA value of the unit/s in the sector.  Results of the Air defense take effect immediately.  Once a unit uses its AA it cannot be used again during that turn to include the air defense phase or air return phase no matter how many other planes pass through the sector.

Re-arming:

All planes that return to an airbase or carrier are required to rearm one full turn.  The turn starts with the next full turn.  If a plane lands during the air placement phase it a re-arm counter will be placed on it and it must remain on the air base/carrier for the remainder of the current turn and the next full turn when the re-arm counter will be removed and the air group will be available.

*Note: If you feel this is too short simply add more re-arm counters. (6 would probably be realistic), but this will extend the game considerably and limit air)

Take off and Landing:

Planes that take off from an airbase/carrier can only move up to one space from the airbase/carrier that first phase.  This is to simulate the air groups forming up.

Air bases/carriers can only launch/land air groups up to their base capacity per air phase.  For example a carrier with a base capacity of three could launch or land up to three air groups in any combination.  For example it could launch two air groups and land one during a particular phase.  It could not launch three and then land three in the same phase.  The landing groups would have to wait until the next air phase to land.  At all times the base capacity of the Airbase/carrier cannot be exceeded during any phase.  This will require Admirals to manage their air groups more closely.

Chitose


Assigning air groups to carriers:

During set up air groups are assigned to specific carriers and air bases.  Additionally a carriers SA is assigned to its associated air group/s and no other air groups can use that SA even if the carrier’s original air group is destroyed.  For example if the USS Enterprise is assigned 3 bomber groups all three can have the expert bomber SA.  When a group is destroyed now only two would be left with that SA from the USS Enterprise and so on.

Air groups can easily be identified by placing a sticky flag on the base of the plane with the ships name and appropriate SA if any.

Air groups from another carrier or airbase can land on a different carrier at anytime, but there is a penalty.  If an air group not assigned to a specific carrier lands on it one additional re-arm marker is placed on that air group for a total of two.

There is not penalty for planes from a carrier landing on an air base; any planes can land at an airbase with no additional penalty.
Requiring planes to re-arm:

Planes are not required to return to an airbase/carrier to re-arm until they actually make an attack.  For bombers and Torpedo planes this includes attacking a ship, submarine or airbase.  For fighters this would involve being engaged in an air defense attack or strafing.  Once this occurs the planes are considered to have dropped their payload/expended ammunition and must return to an airbase/carrier to re-arm. A simple marker could be used to show that a plane unit needs to re-arm.

Aborting aircraft:

When an air unit is aborted as the result of an air defense roll an aborted marker is placed on it.  The air unit is forced to retreat one sector form the direction in which it came.  It is as if the air group was prevented from entering the sector as a result of being disrupted by enemy fire.  The air group still retains its payload and remains in flight.  As a result of being aborted the air unit must remain in the sector during the next air phase and cannot move while it regroups.  After that the aborted marker is removed and the air unit can move normally.

Sinking Aircraft Carriers:

Since planes are now either in flight or re-arming a die roll is no longer used to determine if planes are lost when a carrier is sunk.  When a carrier is sunk all planes that are on board are immediately lost as well.

USS Hornet


Stacking:

Original Stacking limits are in place even when playing with fleets of 500pts or more.  Stacking can be adjusted accordingly by the scenario designer.

OPTIONAL RULES FOR SCENARIOS:

Aircraft Carrier vulnerability:

Reduce vital armor by 1 for each squadron currently on board when the ship is attacked.


Island Air Bases (optional):

Airbases are no longer a notional off the map location.  They are represented by an actual terrain piece located on the map.  The quantity per side and location is determined by the scenario.


Air unit limit per specific airbase is determined by the scenario.  Usually ranges from 2-6 in our scenarios.

Damaging/destroying and airbase:

Now that airbases are an actual location they can be attacked by either naval gun fire or bombing.  Each airbase is usually assigned an armor value and hit point value (hull points).  Typically we do not use vital armor.  A typical airbase would look something like this:


Units: 4    Armor: 4   Hit Points: 6   AA: 5

(Note: if a shore battery is collocated with an air base the AA value of the battery is used.)


When an attack totals or exceeds the armor value 1 pt of damage is done.  When damage equals or exceeds ½ of the airbases hit point it is deemed inoperable and air groups cannot land or take off.  When the hit points are equaled or exceeded the airbase is destroyed and all planes on the ground are destroyed.

Repairing an airbase:

On every turn that a damaged air base is not attacked (successfully or not) and no planes land or take off 1 point of damage can be restored to the base up to the original value.   For example if the above airbase had been bombed and reduced by two and then not attacked for two turns after one point of damage could be restored each turn for a total of two hit points as long as no air units landed or took off from the airbase. This puts the pressure on the attacker to maintain pressure until the airbase is put out of commission.

Shore Batteries (optional): Depending on the scenario some islands or airbases are giving shore batteries.  In our scenarios these islands are usually an objective for the opponent to invade and capture.  A shore battery is basically treated like an immobile ship with an assigned arc of fire if that applies to the terrain.  The values we use for a shore battery are typically equal to a cruiser or less depending on the scenario.

Shore batteries may look something like this:

Heavy battery:
Gunnery: 8/7/6    Armor:  5   Hit Points: 4 AA: 6

Light battery:
Gunnery: 5/4/3 Armor: 3  Hit Points: 2 AA: 5

For every point of damage scored on a shore battery its gunnery is reduced by 1 die the following turn.  Once the damage equals or exceeds the hit points the battery is destroyed.  In our scenarios the battery usually has to be reduced before the invasion can take place.

Garrisons (Optional):

In some scenarios when an island invasion is the objective the particular island may have a garrison assigned. Garrisons like an airbase cannot be directly attack naval units, but they may have to be reduced before the island can be invaded.  A typically garrisons might be 1-3 units.  The invader will then have to move a sufficient number of transports next to the island to overwhelm the garrison by at least a 2-1 margin.  Each transport can carry 1 unit.  The other way to reduce a garrison if you cannot achieve numerical odds with your surviving transports is to reduce the garrison with naval and air units until you can achieve numerical odds or reduce the garrison to zero units and still have one surviving transport that can land.

Typical numbers for a garrison are:
Armor: 3  Hit points: 2    AA: 4

These scenarios add a nice complexity to the game as the attacker has to defend their invasion force while reducing the objective.  These scenarios will usually give the attacker an invasion group with escort, a surface bombardment group and a carrier wing to provide cover.  It makes for some interesting play.


Conclusion:

These additional house rules using the basic WAS frame work and a larger map have definitely increased the playability of WAS as a Naval combat game.  They do not make it a simulation by any means, but do add a bit more WWII naval combat flavor to the game.  Additionally, the options are limitless to design your own scenarios or try to recreate historical engagements using actual order of battles.

WAS is a great out of the box game with excellent miniatures.  The intent of these modification is to stretch the game from a nice beer an pretzels game to a longer more detailed strategy system where the two opposing admirals have to manage air and surface forces to accomplish the goals of a particular scenario instead of just a slug it out in a race to notional objective points.

Current Scenarios for use with this style Map and house rules:

Catapult Vengence:

Mayhem in the Atlantic:

Brawl in the South Pacific:


The above rule set is now is available for free download here:

Rules(Word Document):
http://www.mediafire.com/?19svjnkhnxt068x

Player Aid(Power Point):
http://www.mediafire.com/?e31pebk27igqv1v


Hope you enjoy!


Tuesday, December 27, 2011

Gaming Furlough


Hello All,

It has been awhile since I posted and I figured it is time to update this project.  This entry unlike the rest is going to diverge away from my normal gaming topic and provide an update on why I have not been gaming the past three plus months.
As I last reported I was preparing for a upcoming Military deployment.  Now that is where I am at Camp Bondsteel, Kosovo as part of a Multi-national NATO peace keeping force.
I was reassigned to the HQ  157th Maneuver Enhancement Brigade this past Summer as they were short an officer and I filled the primary staff position of S1 (Personnel officer).  Ironically the 157th MEB motto is “Iron Brigade” so I am thinking that fate played a nasty trick on me. ;)

HHC 157th MEB along with a Platoon from the 32nd MP Company left WI in Mid September to start our pre-deployment training at Camp Atterbury, IN (CAIN).  We were at CAIN for about six weeks where we focused on individual warrior tasks such as weapons qualification, land navigation, European drivers training and many others.

At CAIN we were joined by other U.S. units that would form the nucleus of our Multi-National Battle Group when we arrived in Kosovo.  These units included and aviation battalion, part of a cavalry squadron, a medical company, and several other small specialized units to round out the over 700 U.S contingent of the task force.
Our training at CAIN culminated with a weeklong Command Post Exercise (CPX) at the end of October.  The CPX focused on the leadership and staff functions by using computer generated scenarios that represented issues we may face during our year long deployment in Kosovo.  At the end of October we packed up and left CAIN and headed to Joint Military Regional Training Center (JMRTC) in Hoehenfels Germany.
At JMRTC we again conducted an extended exercise that was the capstone of our pre-deployment training and tested much of what we had learned prior to deployment and while at CAIN.  This time it was not just a computer simulation, but a full out exercise with subordinate troops actually conducting the missions we planned at the HQ.  I am happy to report that we passed with flying colors and were cleared to move on to our Mission in Kosovo.  Just before Thanksgiving we again packed up and flew out to Camp Bondsteel, Kosovo.
At this point I along with a good part of the command staff took a detour to Heidelberg, Germany to receive a number of briefings and make office calls with the U.S. Army Europe (USAREUR) staff.  After more than two months of constant training and extremely long days this was a welcome break for me.  Even more so as we were able to make a few sightseeing stops and visited the ancient walled city of Rothenburg, Germany as well as downtown Heidelberg and the Heidelberg castle which as a history nut I very much appreciated. 

I had been to Germany twice before, but never outside an airport. After our short three day excursion in Germany we also joined the rest of the unit late the night before Thanksgiving.
After a short day off for the holiday to acclimate and enjoy a good Thanksgiving meal we promptly started the Relief in Place/Transfer of Authority (RIP/TOA) process.  This is where the outgoing unit educates and trains the incoming unit on policies and procedures as well as familiarization of the operating environment before they leave.  Typically the process last 2-3 weeks and culminates with the TOA ceremony. 

During this process we also were introduced to the other multi-national units that would serve under us for the first time.  They included units from nine other countries that contribute to the Kosovo Forces (KFOR).  These nations currently include: Turkey, Poland, Greece, France, Germany, Morroco, Ukraine, Armenia and Romania.   After a grueling two and a half weeks of long days trying to extract all the knowledge we could from out predecessors the day of our TOA ceremony finally arrived on 10 December 2011.

The ceremony is a very big deal as it is presided over by the KFOR commander a German Major General.  In addition, we expected several other flag officers including the Commander of USAREUR a three start general.  As the S1 I played a prominent role in the ceremony. As the Adjutant it was my duty to form the troops (including the multi-national members) and start the ceremony.  If anyone is familiar with a formal military ceremony I did do the Adjutant’s walk.

The Ceremony lasted about an hour and went off without any incident and marked the moment when the 157th MEB officially took command of the Multi-National Battle Group- East (MNBG-E).
Our counterparts we replaced left the next day.  Since then we have been very busy getting into our routine and establishing operations.  Technically Kosovo is a peacekeeping operation and it is our job to assist the institutions in Kosovo such as the police to maintain a safe and secure environment (SASE).  If all had gone as planned we would be one of the last commands to perform this mission.  Unfortunately the situation in Kosovo dramatically changed in the North this past summer and tensions have again arisen between competitor groups.  The groups primarily consist of Kosovo Serbs, Kosovo Albanians and organized crime.  At times it has flared up in the north to the point where the Kosovo Serbs and organized crime have established many road blocks to prevent freedom of movement for the government of Kosovo as well as KFOR and in extreme cases shots riots have broken out and shots have been exchanged.
During our tenure here we hope to reverse this course and get things back o track for a political solution.   There never will be a military solution here, so we can only hope to set the table for the politicians to sit down and work things out so we can again get on track to withdraw from Kosovo and let the government of Kosovo whatever that may end up being fully take over with minimal or no NATO involvement.
So that is where I have been and what I have been up to for the past three plus months and has kept me away from my passion of gaming as well as my beloved family.  Unfortunately I cannot bring my family here, but maybe in a small way I can bring some of my love of gaming to Kosovo.
I have already missed several great gaming conventions and a few new gaming releases such as the latest Axis and Allies War at Sea set.  I recently read that Wings of War will now be Wings of Glory under Ares games and is due for a new release next month which I look forward to.  I will not have much time for gaming distractions over here with my limited free time.  One thing I hope to do is update this blog with several AARs form the past.  I created this blog so I could capture all my AARs and how to posts that I had previously posted on various web forums in one place.  Since I cannot physically game here I plan to take some time over the next nine months or so and go back and track down many of the blasts from the past and re-document them here you your reading enjoyment.  Who knows, with a couple of new starter releases on the horizon I may be tempted to order a small distraction and provide some new material as well. J
I hope everyone enjoyed a Merry Christmas and I wish you all the best in the New Year.

More gaming action to come, stay tuned…….