Monday, October 28, 2013

ROCKCON 2013

This past weekend I attended ROCKCON in Rockford, IL.  This is a great gaming convention less than 30 minutes from my home that I have been attending for the past 5 years.

http://www.nobleminis.com/RockconWP/

I will get around to posting specific AARs for the some of the games I participated in and the two I ran, but I wanted to get something up today while it was still fresh in my mind.

I did not attend Friday, but was able to stop by and drop of my Auction items for the Silent Auction.  this is one of the best run and organized auctions of any CON I have attended.  This year I brought a number of items and am happy to report that I sold more than half taking home about $400 and more importantly cleaning some stuff out of my game room.  This also meant I had some spending cash for the Vendors and was able to add some Bolt action figures to my collection.


Some of the Crew from WoG game
Saturday AM I reported early in hopes of getting in to the Wings of Glory game.  My Friend Dan I were able to get in despite the roster being filled.  Met a great group of players from the area some of whom get together on a regular basis for scrambles.  While I own the complete Wings of Glory collection I do not get to play as much as I would like.  It was a real treat to participate in a massive game with over 20 planes starting and then re spawning.  I flew to German Albatross to help the Bed Barron accomplish his victory conditions.  I am happy to report that despite the Allies best efforts the Germans were successful...Long Live the Barron!
Bomber has travelled around the world (litteraly)
Graf Spee Captain contemplating
 next move
Saturday Afternoon with the help of two gaming friend Mike and Dan we ran a Naval Thunder Seaman training event.  I had three scenarios ready to go which each take about an hour to play to conclusion so players could come and play one or stay for them all.  In total we had 8 players sign up and then a few more join us and we ran a total of 4 scenarios.  Battle of the River Plate (twice), Battle of Denmark Strait, and Battle of Empress Augusta Bay.  I think everyone had a good time as one of the players cursed me for getting him hooked on a new game.


Pearl Harbor Counter Strike Set Up
Saturday evening we then ran a larger Naval Thunder Alternate History (Pearl Harbor Counterstrike) which a full AAR we be coming.  We had a total of six players and despite the late hour all had a great time.
Sunday I made it back after a short nights sleep to play a Sails of Glory Demo game.  For those not aware Sails of Glory is a new game published by Ares (Also make Wings of Glory) that they launched through Kick Starter.  This is the first ever Kick Starter I have supported so I was very Eager to try it out as our products are due to arrive anytime now.


Eric Explaining the rules patiently
Eric and his wife Sue did an excellent job introducing the game and the scenario.  The models were pre-production samples, but still look very impressive.  We played out a convoy scenario where the British had to stop a French convoy while the French had to protect it.  I started out with a French Ship of the Line.  Some of my teammates had a bit of difficulty mastering sailing a ship with the wind mechanics.  While they were off taking yachting lessons I manged to place my SoL between the Two British SoL and the Convoy.  Unfortunately I did not fair well during a collision and Eric only new how to give me severe damage counters while giving my 
My First command hotly engaged
opponent zeros.  My SoL is now a nice coral reef.  Fortunately I was able to re spawn with a French Frigate and again get into the thick of the action tangling with two British frigates while my team mates were finishing up their yachting instruction.  When the game concluded I had managed to put one of the British ships out of action, but my frigate was badly mauled.

Really loved the game and cannot wait for my copy to arrive.  Many thanks to Eric for putting on the game and all our antics as we learned the mechanics.

After Sails of Glory I decided to close my gaming experience at ROCKCON 2013 to score some points with household Six by being home early. 

Detailed AARs will be forthcoming as I have time.

Friday, October 18, 2013

X-Wing 3D Laser Turrets


Laser Turret in Episode IV "A New Hope"
Like many I am always looking for ways to enhance my gaming experience.  This is usually accomplished through the addition of terrain and painting models.  When X-wing game out it was obvious that a Death Star scenario would a must and the gaming community obliged by providing down load files for terrain tiles and scenarios.  Later I purchased the nice vinyl Gale force Nine space station Mat.  One thing that I have been lacking is suitable Laser Turrets.  There are some nice 3D ones on the market fro shape ways and others.  The ones I have seen are very costly at $20+ per turret.


My assembled laser turrets in place of asteroids
This past weekend out local group gathered and one of our members displayed some very nice affordable options in the way of a down loadable file to print and produce paper or card stock turrets.  I have since found the file made by Dragon Layers and procured a copy.  I now have 6 Laser Turrets of my own which make a great substitute for asteroids in  the basic game on the Death Star mat.

The turrets can be purchased from FAT Dragon Games.  If you do not already have a Death Star mat the download file comes with Space Station Tiles, 3D Asteroids and the 3D Turrets all for $6.99.  You can print it as many times as you need to make larger battlefields and replace ones that get worn over time.

http://www.fatdragongames.com/fdgfiles/sci-fi/e-z-battlefields-starship-attack-fdg0131

Assembly was very easy.

1. I gathered the materials needed.

Scissors
White glue
Card stock
Styrene plastic card (Optional)

2. Print as many sheets as you need on a heavier card stock paper.  The turrets print two to a page.
Printed File
3. Follow the directions on the page and cut out the turrets and bases.

4. Fold and glue the turrets together.  I was careful not to apply to much glue and make sure you pre-fold/crease all corners before applying any glue.

5.  Once fully assembled I then glued them to the Styrene sheet and cut the base out to provide a stronger base that will not get bent up during storage of transport.


Fully Assembled ready for action
In less than an hour I had six game ready turrets.

Whenplaying I also have a set of squares the same size as the turret bases.  When a ship comes in contact with a turrets (treated like an asteroid for game purposes) I simply replace the turrets with the 2D square so the ship or template can be placed on top and not interfer with game play.

Enjoy!

Thursday, October 17, 2013

Bolt Action-First Contact

Last night I had the pleasure of rejoining the Rockton, IL gaming group.  I had not visited them for the past two years due to deployment and crazy schedule with kids sports since I returned.  They are a great group of gamers who ritually meet every Wed evening to re fight history through many periods.  Our host, Mark has an amazing collection of figures and terrain that span history from ancients through modern and a spectacular gaming room to gather a large group for gaming.


Napoleonic Battle raging next to us
After several failed attempts to get back it finally happened last night.  I saw that Bolt action along with a Napoleonic Battle were on the docket.  I have been wanting to try Bolt Action for some time so I worked the schedule to make it happen.  I have been very interested in this game since seeing it last year at ROCKCON.  The company Warlord games intends it to be used with their line of 28mm figures, but as I confirmed last night there is no reason it cannot be played in any scale and I have a vast collection of 15mm A&A figures.  It is a skirmish level WWII rule set so the 28mm size does look impressive especially for a smaller scale battle.

Their were a total of six players for bolt action three of us had never played.  Scott who was teaching and playing joined Pete and myself with the German facing off against John, Brian and Brian's son Nick as the Americans.  The scenario was welled laid out with hills, roads, woods and four buildings.  Each side initially controlled two buildings and the objective was to control more buildings that your opponent.


Scott's quality troops
Scott provided the rules, charts and figures which were very well done despite his modesty.  Each player controlled roughly two squads, a couple of support weapons and a commander or medic or special weapon team.
 
The German Strategy was to press the right flank while defending the left and leaving 1-2 squads available to run up the middle if the opportunity presented itself.  Pete and I were on the German right while Scott defended our left.  We initially deployed 3 Medium MG and four Squads along with two command teams and a flame thrower on the right.  While Scott kept a Medium MG and two squads in reserve on the left and center.


American Squad Pinned on the wall
The right quickly turned into a blood bath as the American left cover of the wood line to take the wall surrounding our building on the right.  MG fire was extremely effective at initially pinning the U.S. down on the wall and the wood line and then decimating the trapped Squad.  Unfortunately the Germans did not learn as we next advanced to the wall with two squads getting the first destroyed within two turns.  The second was saved though as our MG were able to pin and damage the American MG in the wood line.  This move did draw American reinforcements away fro the center as the advanced to meet our threat.


Flame throwers race into action
As time was getting low both sides started to be a bit more reckless as the opposing flame throwers advanced into the open in hopes of wreaking havoc.  unfortunately for the Germans the U.S drew the first die and toasted the Germans while emptying their fuel tank becoming ineffective.  The Germans were able to advance a fresh veteran squad which managed to finish off one U.S. MG and the wreaked the U.S. squad holding the wood line.

While the battle on the right was coming to a climax and drawing Americans from the center the Germans successfully assaulted the American held building on the hill in the center.  This left the the U.S in control of the top floor and the Germans with the lower level leaving the building contested and more importantly taking control away from the U.S and securing a German victory as time expired.

Final disposition as time expired
Overall a very fun game with some lively banter and trash talk as the two sides engaged.  I really like the bolt action system.  Instead of the typical you go I go command dice are drawn each turn to determine who can move a unit when.  this really mixes things up and makes the order of actions a critical aspect of the game.

Bolt action was already on my want list and this action just confirmed it as a must have.  Now the question is can I really wait until Christmas.

Until Next time......

Tuesday, October 15, 2013

X-Wing Wave three takes flight

This past Saturday I finally had the chance to play X-wing with our local group and use the Wave three ships that I have owned since GENCON, but had yet to play.

Three Games set up
We all agreed to bring a Rebel and Imperial squad so we would not have to face any mirror builds as we switched up players.  Since I had not played with Wave three at all or even Wave two very much I made sure I had some of each in my builds.  This also meant I was not very confident going in  as we have some very skilled players who know how to maximize the various synergies that can be incorporated into the game.  Admittedly this is not my strong suit


I brought the following Squads, both were 100pts exact:
Imperials:
Howlrunner w/ Swarm tactics upgrade
Tie Interceptor Alpha SQRN pilot
Tie Bomber Captain Jonus with Swarm tactics, Cluster missiles, Assault Missiles
Tie Bomber Scimitar SDRN Pilot with Cluster Missiles, proton torps and Assault Missiles

Rebels:
X-wing Wedge Antilles with R2D2 and Marsksmanship
A-Wing Tycho Celchu with Swarm tactics
B-Wing Blue SQDN Pilotwith Fire control and Advanced Proton Torps x2

Initially we had seven player show up and an eighth join us later, so we started with three games(one a three player) at once and played a total of four games.  in about five hours.


Imperials look to divide and conquer against Han and B-wings
I was a bit rusty at first and had to brush up on the rules as we went along, but it all came back to me. My first two games were with my Imperial Squad which despite my lack luster performance with the missiles performed well against builds that both contained the Han Solo Falcon.  I think the Tie Bombers fully loaded will be the new bain of the Falcon build.  Firing missiles at Range 1-2-3 was pretty damaging and CPT Jonas ability to allow the other pilot to re-roll really helped especially since I did not roll that well.  For the cost the Tie Bomber brings a lot of hit points to the table so it has some staying power.  Both games resulted in a Imperial victory.


Two Firespray build was no match for Wedge and crew

My third game I switched to my Rebel build and faced off against Boba Fett and Bounty hunter two Firespray build along with Howlrunner.  My opponent viewed the B-wing as such a threat due to the Advanced Protons Torps that he continued to maneuver out of range and target the B-wing which also has some good staying power despite the lack luster agility.  The B-wing went down with the Torps on board, but not before getting a few primary gun hits in and more importantly allowing Wedge and Tycho to tear up the Bounty Hunter and Howlrunner leaving Boba to go it alone against both of them undamaged.  The Rebels were victorious as they chased the wounded Boba off the map.

My final game brought back my imperial squad against a 4 ship Rebel Squad.  This one went down to the wire, but in the end the pair of Tie Bombers prevailed as the took down his Wedge.


Imperials overpower Rebels with multiple Missiles
In the end I was shocked that I went 4-0, but more importantly it renewed my interest in this great game.  X-wing is currently the only Non-historical game I play.  My friend informed me it is actually a historical game because it is is set a long time ago in a galaxy far far away. Cannot wait to play again which should be in a couple weeks now that H.S. Football is coming to an end and I will have my Friday evenings free again.
BTW, the turrets that you see do not belong to me, but one of our local members downloaded, printed and assembled them.  Look great for card stock and add a nice alternative to the asteroids especially when playing on the space station mat.  I will be adding some to my collection some along with a 2D version for when the ships come in contact with them.
Until next time........."May the force be with you".

Wednesday, October 9, 2013

Pre-Dreads Galore

Existing 1/2400 Fleets
While preparing for last weeks NAVCON I was admiring my fairly large 1/2400 scale Pre-Dread collection which sadly has not seen any service since prior to my most recent deployment.  My group decided to go with WWII scenarios for NAVCON, but I still want to get my Pre-Dread fleets sailing again. 

"Remember the Maine"
I currently have the entire RJW fleets as well as those for the Spanish American War.  We have done all three major battles for RJW (Ulsan, Yellow Sea and Tsushima) multiple times.  I attempted to do SPAN-AM, but all the historical engagements are so lopsided it begs for alternate history with additional ships.  As a result I ordered some, well OK I ordered many.
Tsushima fought at Hedgecon 2011

I placed my order with Panzerschiffe last week to complete the entire U.S. navy up to 1905 along with the Spanish fleet so I can inject the aging battleship Pelayo and others which were actually in route to Manila before being recalled.  Additionally, I ordered several German ships who historically tried to provoke Commodore Dewey into a conflict during the SPAN-AM war and had other disputes with the U.S. in the Pacific as well as secret war plans to invade the U.S East coast at the turn of the century.

USN Additions
Spanish and German Fleets


Masts added using piano wire
My thought is with my existing RJW fleets and these new additions I can stage alternate history battles between the IJN and USN or USN and Germans as well as expand on the SPAN-AM war.  Either way it should make for some good gaming.
 
Best part is when I arrived home from NAVCON last weekend my package had arrived.  In addition to the back log of other projects my work bench is now completely full for the fall.

The ships  are already primed and waiting for paint.  I have been working on bases and getting them labeled as well as securing more wire for masts.  My hope is to start painting this weekend.  I doubt these will be ready for ROCKCON at the end of the month, but definitely Little Wars next spring. 

Monday, October 7, 2013

Java Sea AAR-Naval Thunder

This Past weekend I had the opportunity to attend NAVCON 2013 after a two year absence due to my last deployment overlapping.

If you are a Naval Gamer and have not attended NAVCON in the past I highly recommend it.  It is a nice small event that continues to expand each year held in Oak Creek, WI just south of Milwaukee.

http://www.navcongames.com/

My friend Mike and I ran two Naval thunder events which were well attended.  in actuality they were over attended as we had planned for up to eight players and actually had ten at the first event and eleven at the second.  We were happy to make room though as it is tough to turn away interested parties.

The First event was Java Sea which Mike had put together using his 1/2400 GHQ minis and I helped judge.  As mentioned we ended up with ten total players which were each given command of a portion of the IJN or ADBA fleets.  It was a good mix of Experienced as well as new players so we were able to teach the new players still getting their sea legs while keeping the game moving along for the veteran seamen.

Scenario:

Battle of Java Sea
FEB 27, 1942

The Battle of the Java Sea was a decisive naval battle of the Pacific campaign of World War II, that sealed the fate of the Netherlands East Indies. Allied navies suffered a disastrous defeat at the hand of the Imperial Japanese Navy, on 27 February 1942, and in secondary actions over successive days.
 
HMLS DeRuyter Doorman's Flagship
The American-British-Dutch-Australian Command (ABDA) Strike Force commander—Rear-Admiral Karel Doorman was killed. The aftermath of the battle included several smaller actions around Java, including the smaller but also significant Battle of Sunda Strait.

The ABDA force engaged the Japanese in the Java Sea, and the battle raged intermittently from mid-
afternoon to midnight as the Allies tried to reach and attack the troop transports of the Java invasion fleet, but they were repulsed by superior firepower. The Allies had local air superiority during the daylight hours, because Japanese air power could not reach the fleet in the bad weather. The weather also hindered communications, making cooperation between the many Allied parties involved—in reconnaissance, air cover and fleet headquarters—even worse than it already was. The Japanese also jammed the radio frequencies. Exeter was the only ship in the battle equipped with radar, an emerging technology at the time.

IJN Nachi

The battle consisted of a series of attempts over a seven-hour period by Doorman's Combined Striking Force to reach and attack the invasion convoy; each was rebuffed by the escort force with heavy losses being inflicted on the Allies.

THE GAME


JAVA Sea Set up and ready to go
Turn one saw the fleets jockey for position as they moved toward engagement range.  The crew of the HMLS DeRuyter noticed two torpedo wakes pass by their ship and suspected Japanese subs might be in the area.   The British DDs immediately began to lay an effective smoke screen while the HMS Exeter opened up on the IJN Jintsu with no effect to try and determine range.  IJN Heavy Cruiser Nachi also launched a salvo from 28,000 yards with no effect.

Turn 2 action

Turn two opened with the HMS Exeter scoring two hits o the IJN Jintsu knocking out a torpedo  mount and causing ,massive flooding with a hit to the water line.  The crew of Exeter could not celebrate their success though as they were busy catching a full broadside from Nachi who scored two hits knocking out a secondary battery and damaging the engine room reducing her speed.  A second formation of IJN ships lead by the IJN Naka entered the fray as she opened up on the Dutch DD HMLS Witte De Wittte with no effect, but making her presence known.

Turn 3 Action


HMS Exeter being Pounded
Turn 3 was not favorable for the ABDA.  Exeter's crew lost their radar solution on IJN Jintsu and was unable to fire.  USS Houston entered the action with an opening salvo on IJN Nachi with no effect.  The Japanese gunners were definitely up to the task though as Haguro fixed it main guns on HMS Exeter and unleashed a full broadside scoring 3 hits two of which penetrated causing more engine damage and Major Flooding further reducing Exeter's already reduced speed.  Naka opened on USS Houston scoring a critical hit which damaged the fire control center.  Additionally, the Jintsu and two of her DDs opened up onto HMS Jupiter and HMS Encounter damaging both of them.  On board Exeter Damage control parties rushed to the scene of the flooding, but were not able to contain this turn.

Turn 4 HMS Exeter is lost
Turn 4 did not improve for the Allies.  The IJN DDS effectively started laying a smoke screen to mask their ships as they maneuvered to close the range with the ABDA.  IJN Haguro let loose another deadly salvo which scored three penetrating hits on HMS Exeter.  Despite the best efforts of her crew the damage was more than Exeter could sustain as she came to a full stop and began to sink.  USS Houston did not fair much better as Nachi pummeled her with 8in shells scoring four hits.  Due to an Air attack a few days earlier USS Houston started this action with her aft turret inoperable Nachi now took out one of her two remaining forward turrets as well as two secondary batteries.  Meanwhile the IJN light cruisers and their DDs continued to pound on the ABDA escorting DDs.  HMS Jupiter was set ablaze, HMLS Witte De Witte took a hit to the bridge which killed the entire bridge crew and set her on a course straight for the IJN line of Battle.  The ADBA did manage to strike back hitting the IJN DD Yukikaze damaging her engine room and taking our one of her batteries.

Turn 5 saw the ranges continue to close.  The ABDA was not ready to back down and were determined to get in to a knife fight with the IJN forces in an effort to break through and reach the landing convoys.  Unfortunately communications were lacking and the USS Houston now with only
Turn 5 saw the ADBA start to hit back
one Main Battery turret operational opted to turn away and preserve the ship.  Haguro now done mauling the Exeter turned its lethal 8in guns on the HMS Perth scoring a critical engine room hit reducing her speed.  At the same time HMLS Java was taking fire from Nachi and started to flood.  The Light cruiser Naka opened on the USS Paul Jones setting her ablaze.  The damage control parties did not have to worry about the fires for long as she immediately began to sink.

Admiral Doorman aboard the DeRuyter was undaunted through and opened up on the IJN DD Hyashio send her to the bottom in a matter of seconds.  HMLS Java opened up and ravaged the DD Amatzukaze with 5 hits from her 6in guns sending her to the bottom as well.  Despite being out of control the Witte De Withe unleashed her guns on the IJN Kuroshio setting her ablaze.  Unfortunately the Dutch DD was overpowered and began to sink as well.

As the lines were now almost point blank range the opposing DDs launched multiple salvos of torpedoes in addition to the short range gunnery duel that ensued inflicting tremendous damage.  While
Turn 5 Torpedoes in the Water
The ABDA did score some hits the IJN gunnery was especially effective.  HMLS Java was hit and damaged, USS Edwards was sunk, USS Alden was overpowered at short range and sunk.  The ADBA was only able to score damaging hits on the DD Natsushio.  The the Torpedoes that were in the water began to hit home.a Torp that had been launched by USS Edwards slammed into IJN Asugumo and successfully detonated breaking her in half.  As tremendous explosion was heard across the waves as a 24in Long Lance lifted the HMS Encounter clear out of the water and then sent her straight to the bottom with massive loss of life.  Damage control, parties on both sides worked feverishly to put out fires and control flooding.  The IJN Minegumo was overcome with her decks awash and slipped beneath the waves as HMLS Java's crew struggled to control their flooding causing the ship to take on a severe list.

Turn 6 devolved into more close gunnery exchanges and the surviving DDs worked feverishly to reload Torpedo tubes.  Haguro unleashed yet another deadly salvo this time targeted at Admiral
Turn 6 Final round of carnage
Doorman himself aboard the HMLS DeRuyter.  The crew was catching lead by the bucket full which was more than the Dutch cruiser could stand as she broke up under the hail of 8in shells as started her long journey to the bottom of Java Sea.  Naka raked USS ford with a salvo as well sending her to the bottom.  the sailors aboard USS ford had already managed to launch a final spread of torpedoes which eventually found their mark on Naka and successfully detonated blowing her apart while her crew was celebrating their temporary success. The USS Houston is shelled by Nachi as she flees the battle area, but this time none of the IJN shells find their mark.  In a defiant act the HMLS he Java crushes the DD Tokisukaze with gunfire sending her to the bottom.  Unfortunately for Java a 5.9in shell from IJN Jintsu finds it mark causing a cartographic Magazine explosion.  Finally the HMS Perth fires on DD Kuroshio at short range lighting her up stem to stern with a one way ticket to the bottom of Java Sea.

Despite inflicting significant damage on the IJN the ABDA realizes that the fight is long since over for them as they have not even touched either IJN Heavy cruiser and the game is called.  The game resulted in a allied defeat, but the Japanese victory was not as one sided as it was historically.

Overall losses:

ABDA                                                                  IJN
Historical/Game             Type Ship            Historical/Game
1 Sunk/1 Sunk                   CA                               0/0
3 Sunk/2 Sunk                    CL                              0/1 Sunk
3 Sunk/7 Sunk                    DD             1 Damaged/6 Sunk

Overall a great time.  new players were exposed to the Naval Thunder game and veteran sailors also had a good time.  Thanks to Mike for doing the research and leg work on putting together this scenario.  it is always a pleasure to see his beautiful models in action.

For more infornation on the game rules you can find them here:

http://navalthunder.com/


Tuesday, October 1, 2013

Pearl Harbor Counter Strike-Dec 8th 1941 an alternate history

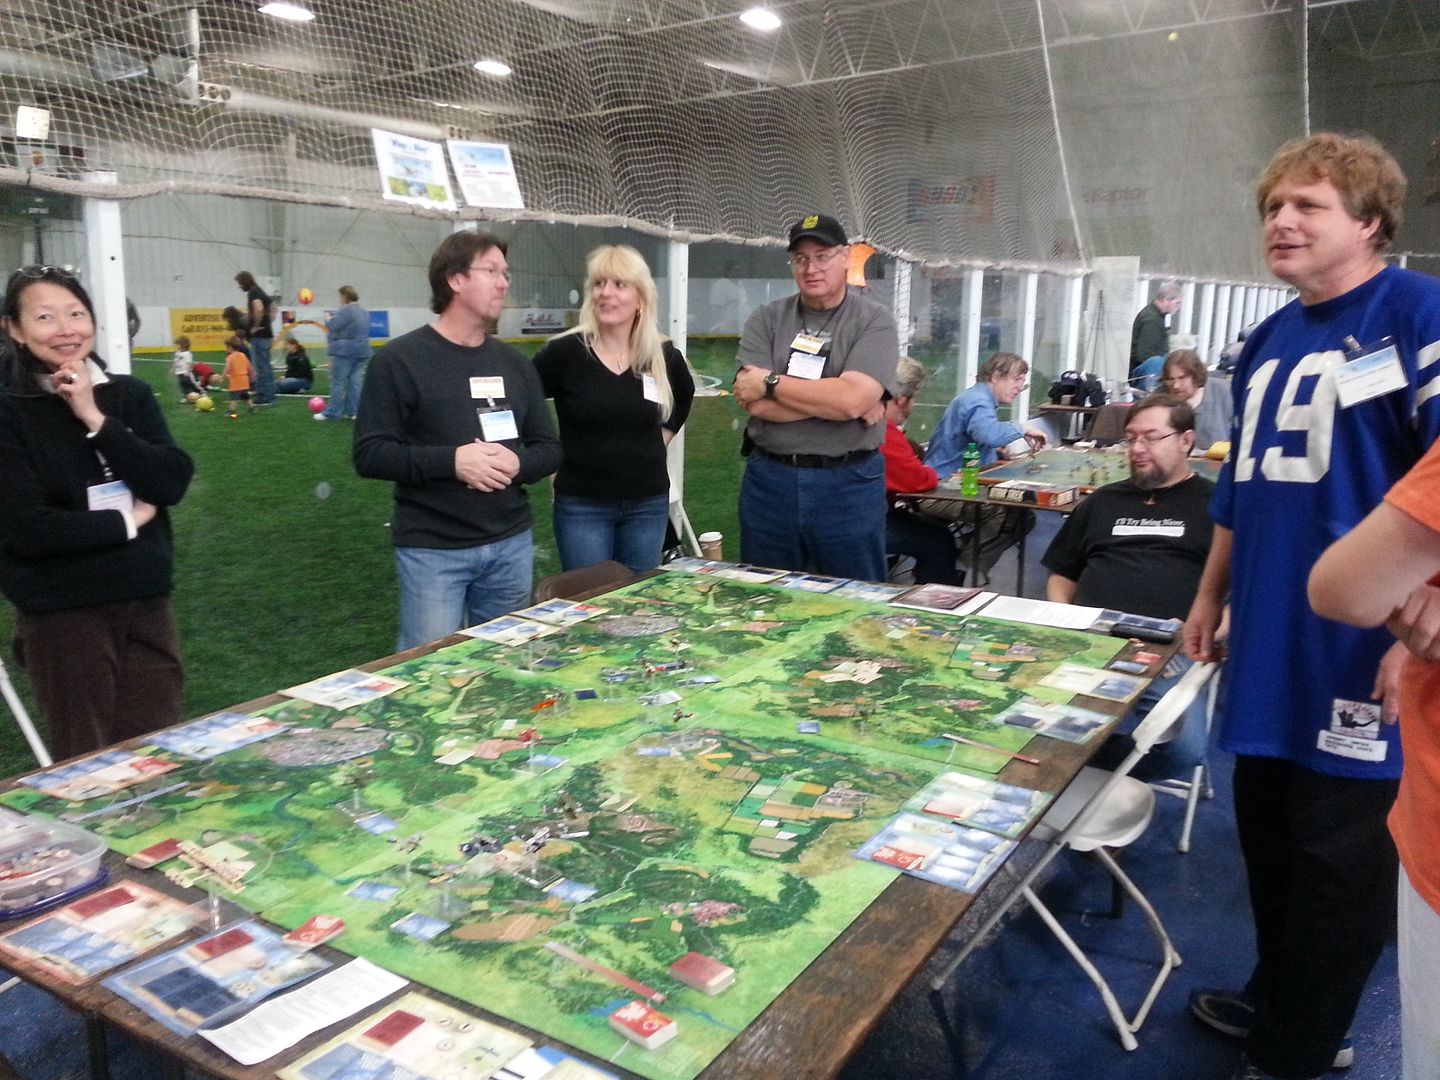
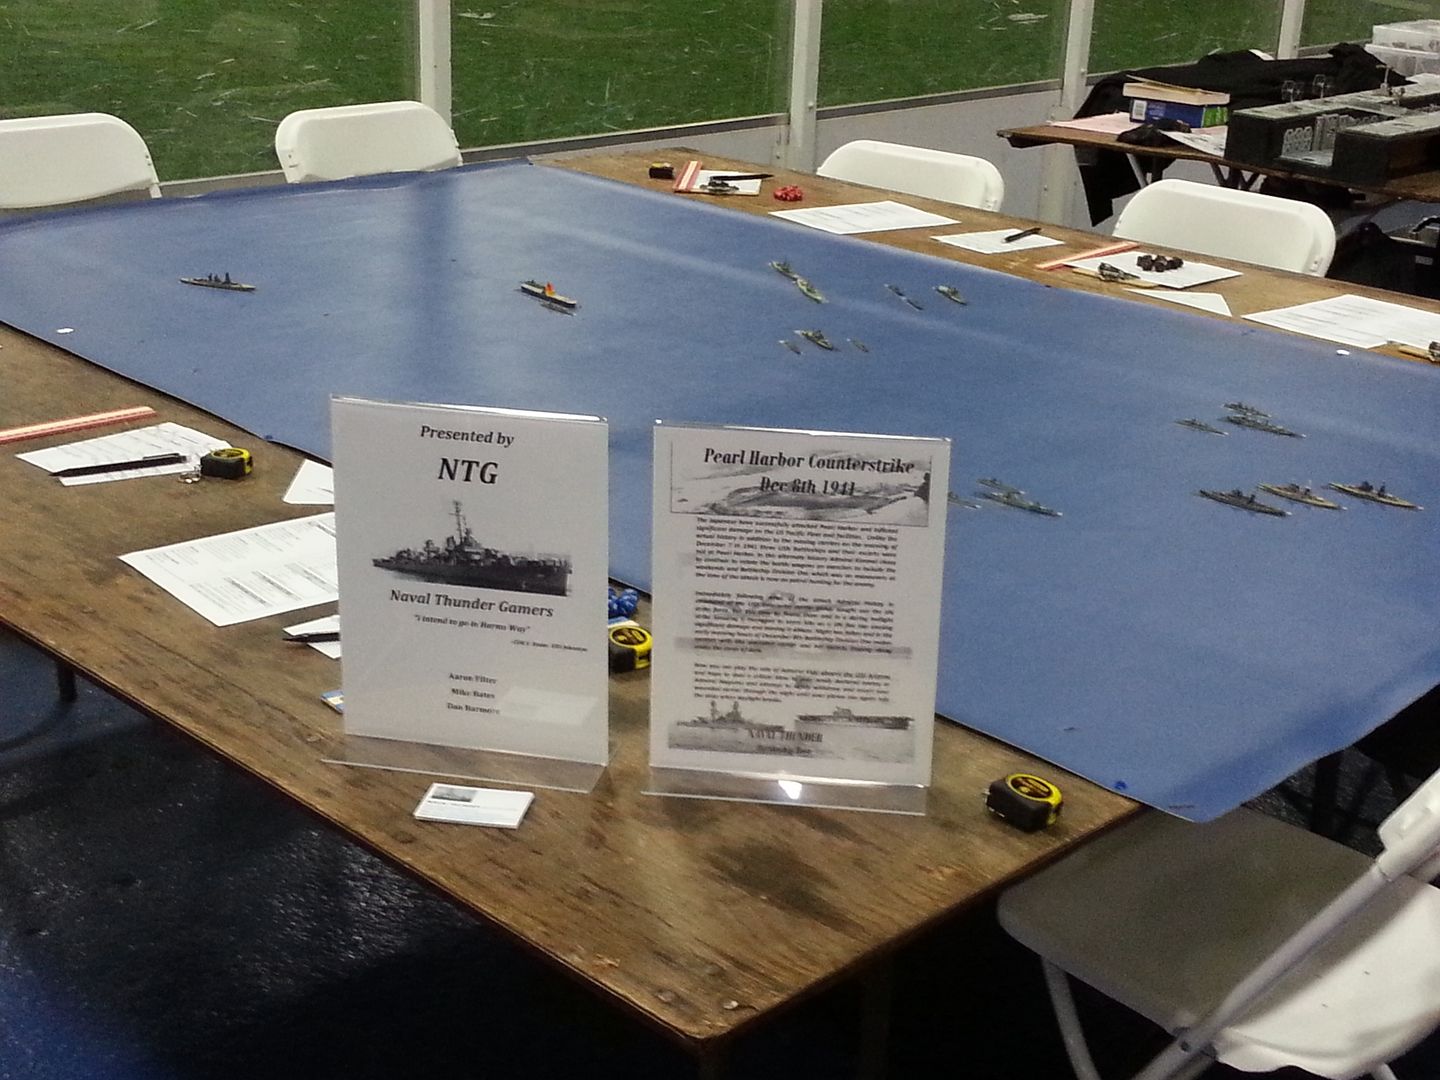
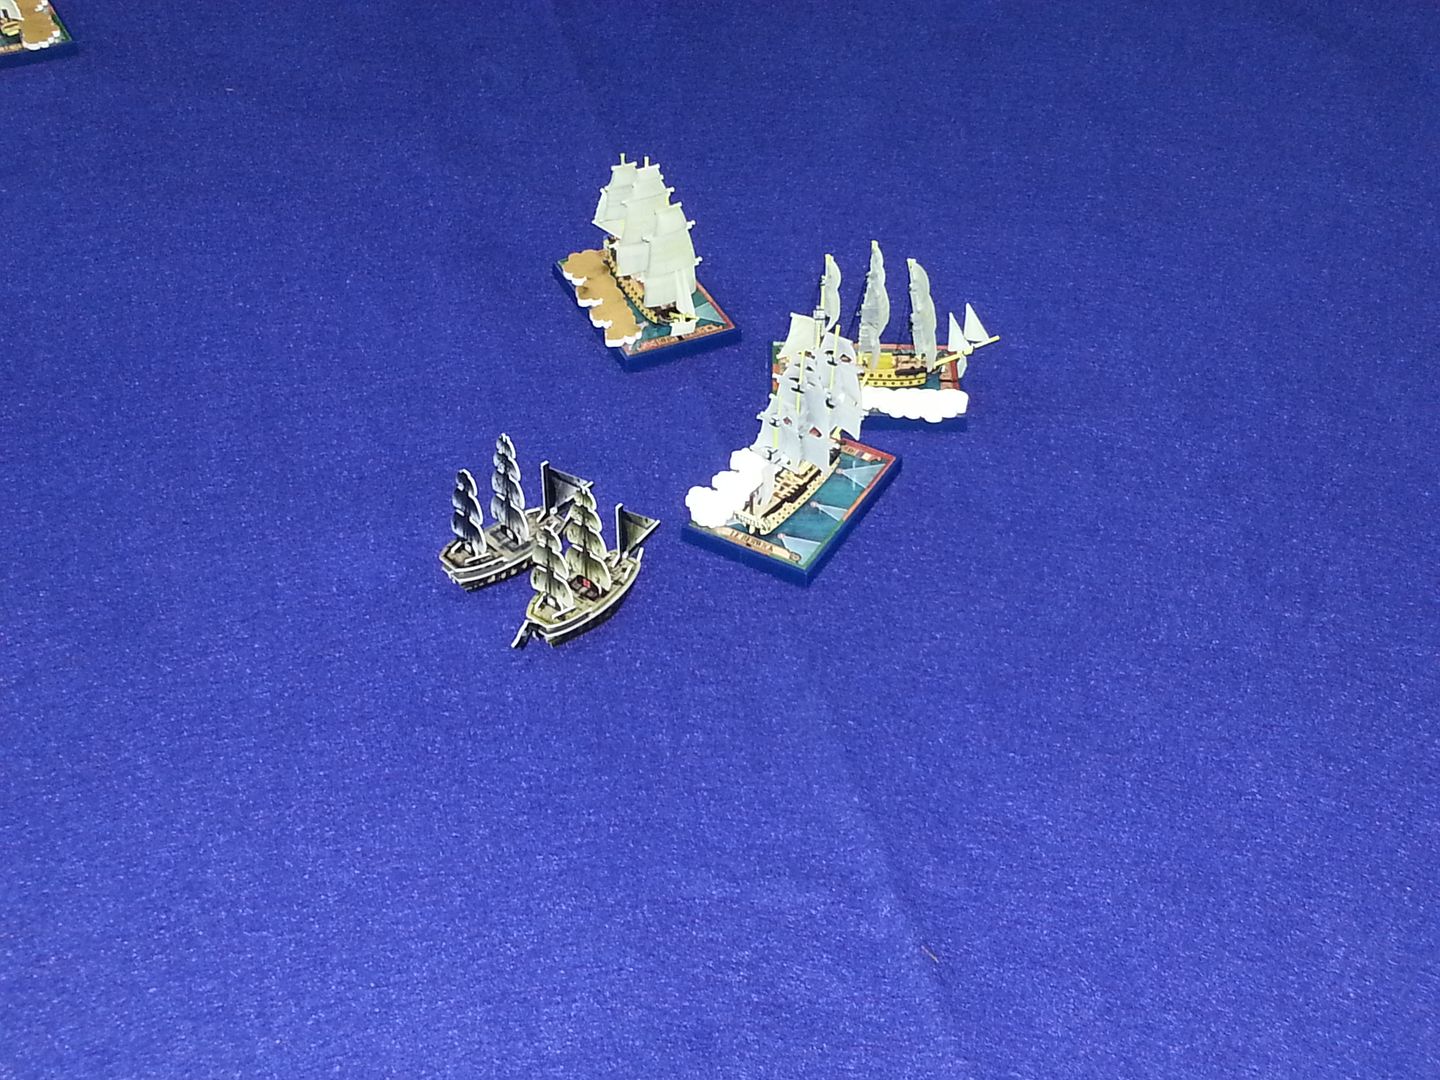
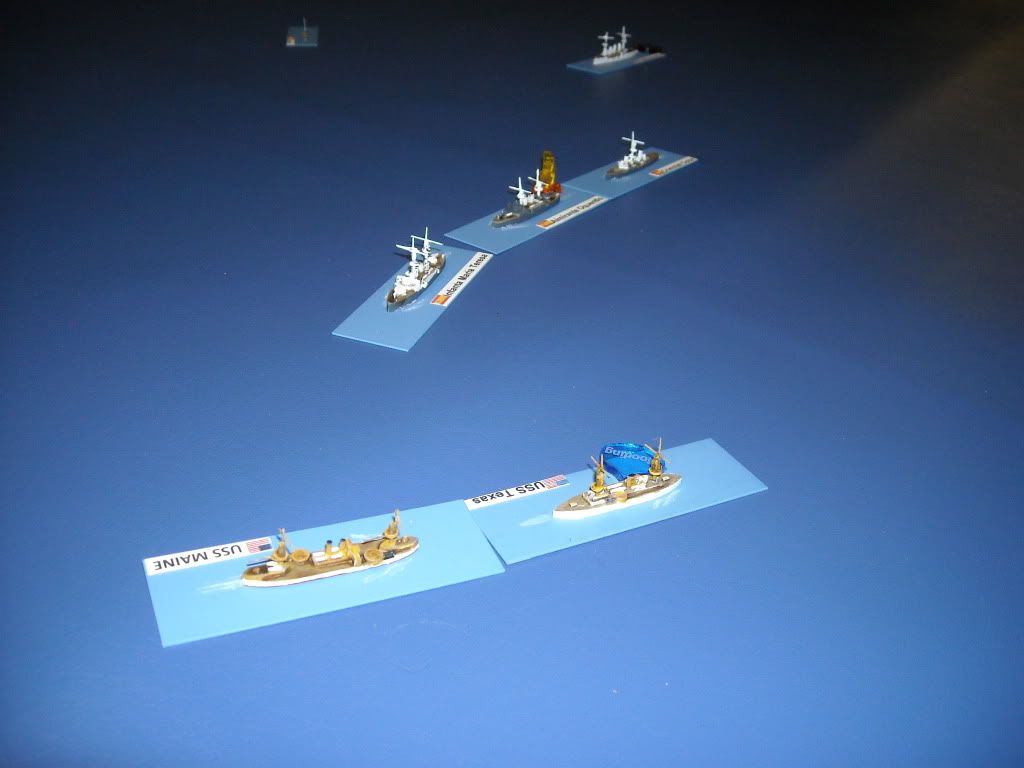
I am getting ready to attend NAVCON 2013 this weekend.  It has been two years since I attended due to the timing of my most recent deployment.  As a result I am very much looking forward to this one.  I am helping a friend run a Naval Thunder scenario for Java Sea.  In addition I put together this alternate history scenario which I have been wanting to do for some time.


Situation:
Just like history the Japanese have successfully attacked Pearl Harbor and inflicted significant damage on the US Pacific Fleet and facilities at Pearl Harbor. Unlike the actual history in addition to the missing carriers on the morning of December 7th 1941 three USN Battleships and their escorts were not at Pearl Harbor. In this alternate history Admiral Kimmel chose to continue to rotate the battle wagons on exercises to include the weekends and Battleship Division One which was on maneuvers at the time of the attack is now on patrol hunting for the enemy.
Immediately following news of the attack Admiral Halsey in command of the USS Enterprise carrier group sought out the IJN strike force, but this time he found them and in a daring twilight strike Scouting 6 managed to score hits on a IJN flat top causing significant damage and leaving it ablaze. Night has fallen and in the early morning hours of December 8th Battleship Division One makes contact with the wounded carrier and her escorts limping along under the cover of dark.
Now you can play the role of Admiral Kidd aboard the USS Arizona and hope to deal a critical blow to your newly declared enemy or Admiral Nagumo and attempt to safely withdraw and escort your wounded carrier through the night until your planes can again rule the skies when daylight breaks.


Kirishima
IJN Force:
CV Hiryu: CMD 8, Hull 40, Speed 3, Fire burning
BB Hiei: CMD 8
BB Kirishima: CMD8
CA: Tone: CMD 8
CA Chikuma CMD 8
DD Tanikaze CMD 8
DD Urakaze: CMD 8
DD Isokaze: CMD 8
DD Hamakaze: CMD 8
DD AKEBONO: CMD 8
DD Ushio: CMD 8
BB NAGATO: CMD 9


USS Nevada
USN Force:
BB USS Arizona: CMD 8
BB USS Nevada: CMD 7
BB USS Oklahoma: CMD 7
CA USS SanFransico: CMD 7
CL Raliegh: CMD 7
DD Cummings: CMD 7
DD Selfridge: CMD 7
DD Phelps: CMD 7
DD Tucker: CMD 7


Set Up:
 
IJN: Hiryu is placed in the center of the battle area and 60” from the USN deployment edge with two DD within 2” The remainder of the IJN fleet is deployed within 12” of Hiryu.
USN: Deploys all ships in a box 24” wide and 24” from the edge centered on the short side of the battle surface.
Scenario Special Rules:
As Hiryu is on fire she is immediately spotted by the USN ships.  Any IJN ships directly between Hiryu and a USN ship are also spotted as they are silhouetted. Otherwise, IJN ships are not spotted until they fire or a USN ship is within 48” and successfully targets them with Radar.  Hiryu cannot be engaged if there is another IJN ship at shorter range that has fired.
USN Objective is to sink Hiryu
IJN Objective is to successfully retreat Hiryu from the opposite edge of the battle area.
USN must break contact and retreat after 12 turns due to impending

Optional Rules in affect:
Acceleration
The basic rules allow ships to stop and start at will. In reality, it took some time to make changes in speed. Under this rule, ships may only change their speed a limited amount depending on which move step they are assigned to.

Move Step
Max Speed Change/Turn
Battleship
1
Cruiser
2
Destroyer
3

For example, a cruiser that used 5 movement points last turn may move between 3 and 7 movement points this turn (assuming it has enough movement points).  Ships that are currently moving faster than their maximum speed due to battle damage sustained automatically lose 1 point of speed each turn until they are within their maximum.  As long as the ship has any movement points remaining, movement orders may be given to the damaged ship to slow its movement more quickly, if desired.
 
Crossing the 'T'
Warship armor belts and torpedo defenses are less effective against shells and torpedoes striking from the front or rear of the ship. Whenever the firing ship is in the forward or aft arc of the target ship, the firing ship gains +1 to penetration rolls on successful shell and torpedo hits. However, the narrower aspect of the ship and greater rate of closure (or departure) the target is a more difficult target to hit.

All shooting (gunfire or torpedo) takes a +1 penalty to the target number when attacking from the forward or aft arc of the target ship.

Laying Smoke
Destroyers and light cruisers have the option of laying smoke during their move.  In order to lay smoke, write SM in front of the ships movement orders for the turn.  Indicate smoke

has been laid by placing smoke markers behind the ship as it moves.  You will need two different colors of smoke markers.  Place one marker of each color at the stern of the ship before it starts its move, then place one marker of each color at the stern of the ship after its move is completed.  Fill in the gap between the two markers following the ship's line of movement with several markers of each color. The markers dont have to be edge to edge, but the line of the smoke trail must be clearly discernible in both colors of smoke marker.
 
During the pick up smoke markers step of the end phase, pick up all smoke markers of one color. Alternate the color that is picked up each turn.  In this way, each turn you will pick up half the smoke markers of the current turn, plus the remaining smoke markers that were not picked up the prior turn.
 
Line of sight cannot be drawn through ay line of smoke markers.  Gunfire and torpedo attacks are not possible through smoke.

Nationality Bonuses:
USN:

Magnetic Exploders During the early war period (1939 1942), when rolling to hit with torpedoes from any source (ship, sub, aircraft), all odd to hit rolls on the dice are treated as misses.  Thus, against a target number of 7, a die roll of 9 still counts as a miss.

If the roll would normally provide a chance for a follow-up attack (see Torpedo Resolution in Chapter 3 Shooting), the player is still entitled to make the follow-up attack.

Advanced Radar U.S. radar was sufficiently advanced to allow for completely blind fire. U.S. ships with fire control type RDR are able to make gunfire attacks through smoke and have a 40” target limit (instead of 20”) during night battles.

IJN:

Night Fighting Skills – Ships with fire control type JPN receive a – 1 bonus to the target number needed to hit during night battles. This applies to both gunfire and torpedo attacks.

Powerful Torpedoes – Japanese 24” torpedoes receive a +1 bonus to torpedo penetration rolls.


Night Battles

When the engagement occurs at night, the following restrictions are in place:

Visibility is limited to 20”.  Without a special nationality bonus rule that grants an exception, no ship may be targeted outside this range.

Range modifiers for all attacks are doubled. Attacks at short range receive a +1

modifier.

Ships on fire may be targeted normally and shooting at them is treated in all respects

as if the night battles rules were not in effect

Unreliable Radar

Radar technology during World War 2 was primitive in design and frequently operated by inexperienced users.  When using this rule, proceed through the shooting steps as normal. However, before any ship equipped with fire control type RDR shoots its main battery, make a command check for that ship modified by its crew rating. If the command check is failed, the ship is treated as though it had fire control type STD for that turn.

When radar is being used to blind fire during night battles or through lines of smoke, a failed command check means that the declared targets are no longer valid. Any fire declared against targets that are no longer valid is forfeited.  The attacker has lost track of the enemy on his radar plot, and checks his fire until he can verify the target.

 I am not yet sure how balanced the scenario will play out.  Based on points it is even without Nagato, but you really cannot count Hiryu as she is more of an objective and cannot launch air strikes.  I added Nagato which balances out the points, but I think she might be held in reserve and released if the IJN is doing very poorly as she was not really part of the Pearl Harbor Stike force.

I guess time will tell and I will be sure to post a AAR after the event.

The optional rules included in the above sceanrio are right out of the NAval Thunder rules.  If you are not familiar with Naval Thunder you can check it out here:
http://navalthunder.com/

They have some great deals on bundle packs right now if you are like me and want it all.  They are currently my go to rules for Naval Warfare of all periods Pre-dreads through WWII.